
Add Tickets
Open the Event in the Dashboard.
Open the CMS module and click on the Registration Section.
[ Note: Registration page once the user Enabled the registration.
On the Registration page, click on “Add Ticket.”

Users can add two types of tickets:
Free Ticket
Paid Ticket
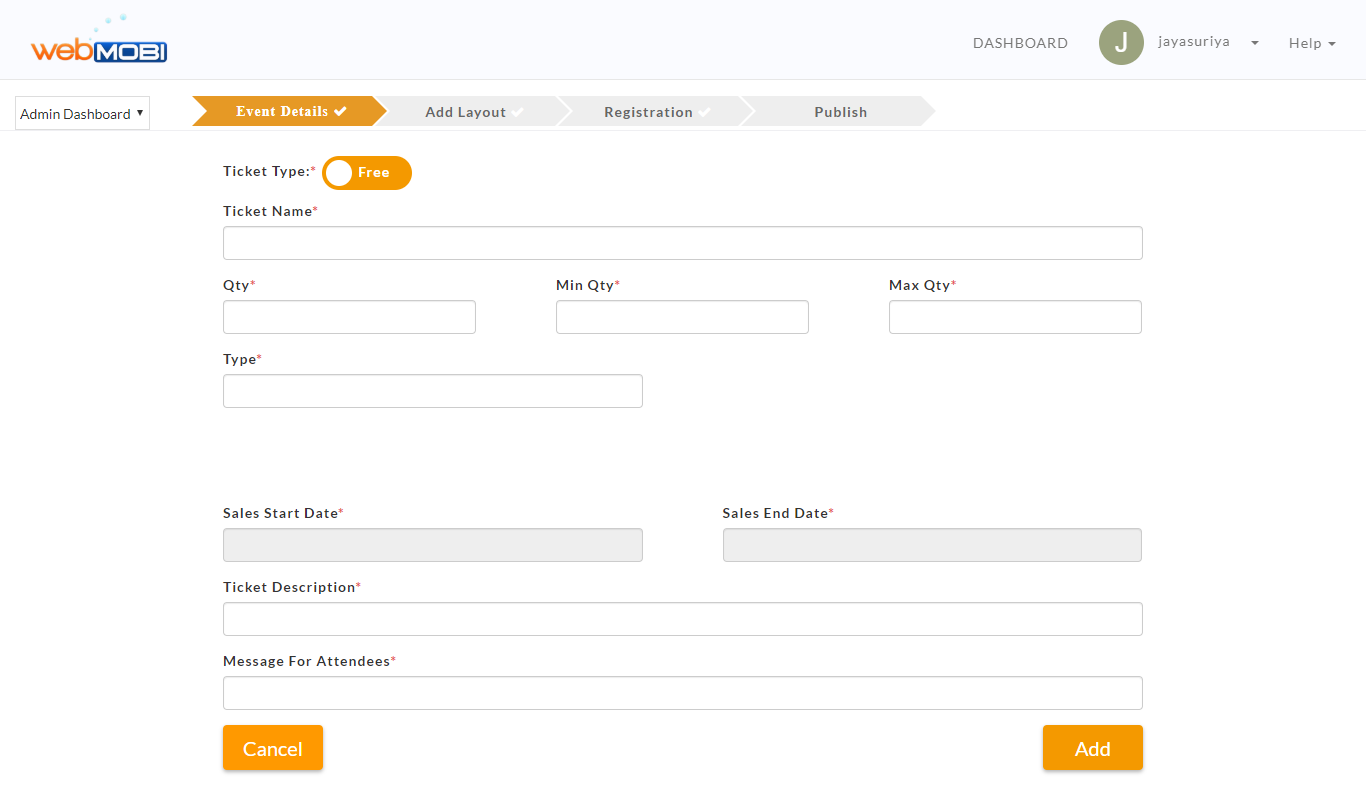
Free Tickets
1. Enter some basic details like Ticket name, Quantity, Type, etc, and click on the ADD option.
2. Admin will be able to see all the ticket details. Here there are three types of availability:
Available - Tickets are available
Halt - Tickets are blocked now
Hidden - Ticketing will not be shown.
3. In Action, click on the settings icon to edit or delete the Ticket.
In a Free ticket, the user need not pay. Here on the event website, the attendees can select the event and number of tickets and continue the registration.
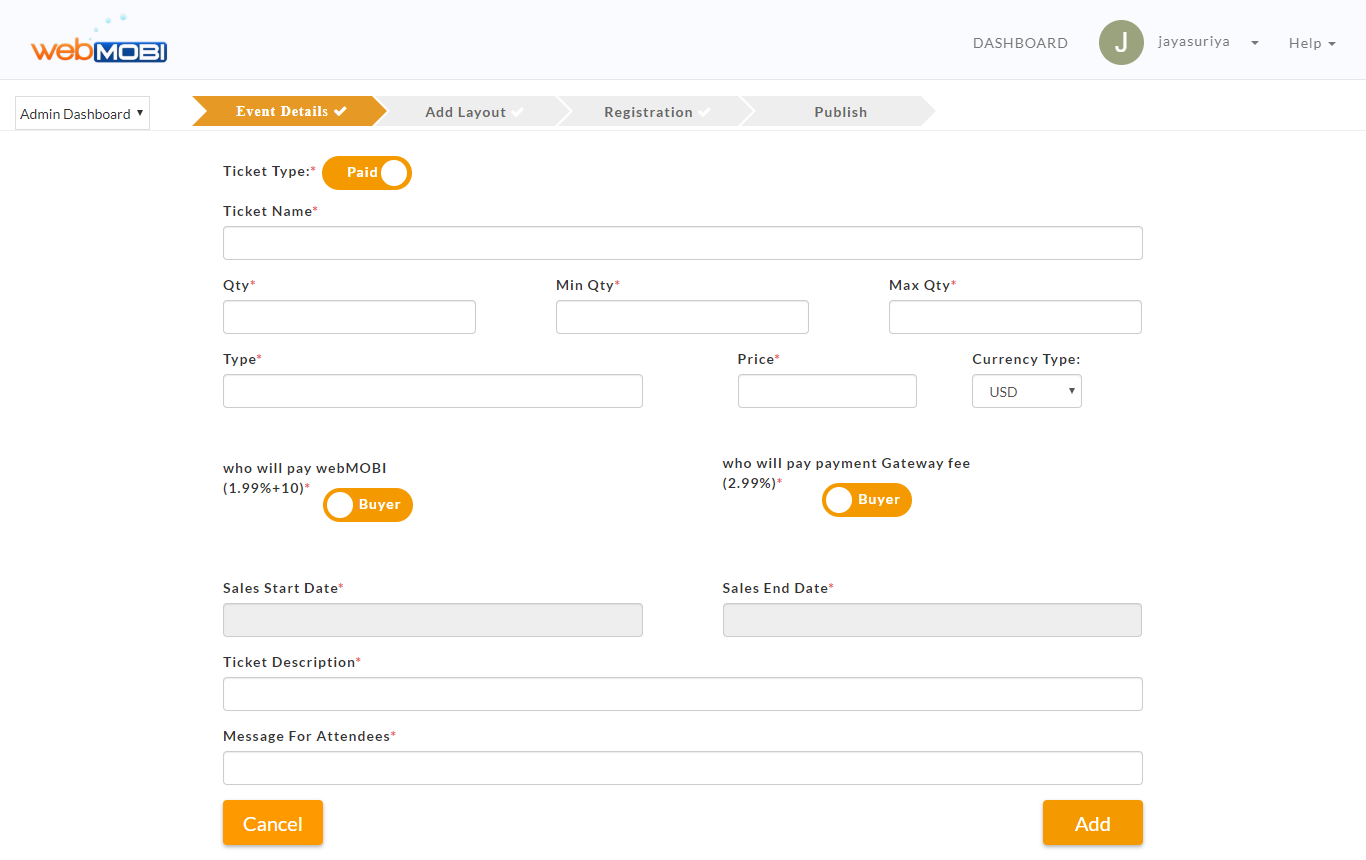
Paid tickets
Switch the button from Free to Paid ticket on the Registration page after tapping on Add Ticket option
Enter some basic details like
Ticket Name
Quantity
Type
Price
Currency Type
Payment to webMOBI and Gateway fee:
Here Organizer can choose how he wants to pay the webMOBI and Gateway fee
1. If the Organizer enables the “Me” button, then the Organizer needs to pay for each ticket bought by the attendee i.e. (8%) to webMOBI and (2.99%) as the Gateway fee.
2. If the Organizer enables the “Buyer” button then the amount to be paid for webMOBI and Gateway will be added to each ticket bought by the attendee i.e. (8%) to webMOBI and (2.99%) as the Gateway fee. Here the Organizer needs not to pay, but it will be added to the original ticket amount.
Sales start date and end date
The Admin can specify a particular start and end dates to start and end his sales
Before the sales start date, the attendee cannot register or buy the Ticket.
Ticket description
Message for attendees
Clicking on “ADD” users will be able to see all the ticket details.
Here there are different modifications to do on tickets as:
Available - Tickets are available.
Halt - Tickets are blocked now.
Hidden - Ticketing will not be shown.
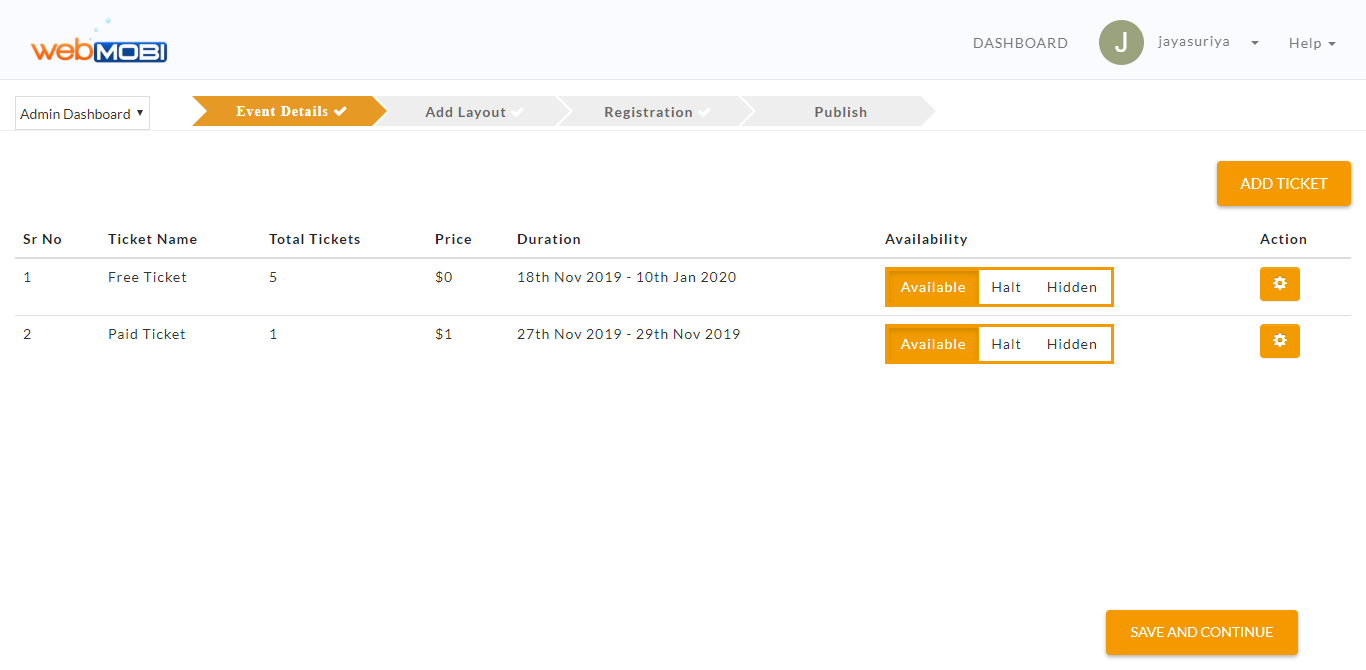
Click on Save and Continue, and the ticket information will get reflected on the website.
Now the user can add the question to get the attendee data on the website registration page. So, users can move to the ‘Registration and Preferences’ page to add the questions needed to show up on the Registration page.
Registration and Preferences Questions
Here user can add some questions for the registering people, and can select the type of question from different options as below:
Single choice with feedback
Single choice without feedback
Multiple choices with feedback
Multiple choices without feedback
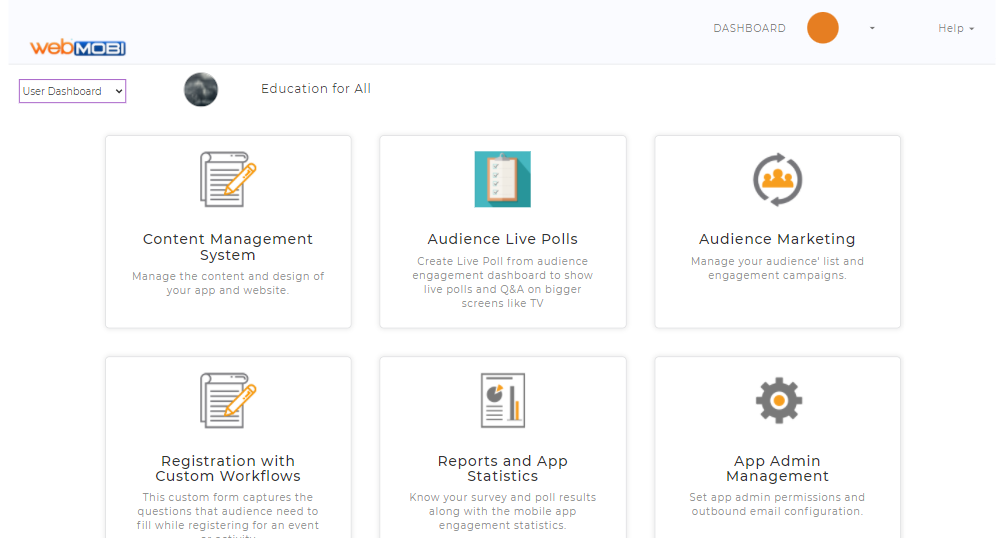
Customer response
Select the “Registration with Custom Workflows” module
Add Heading:
To add Heading, click on the “Add” button to open a Header pop-up.
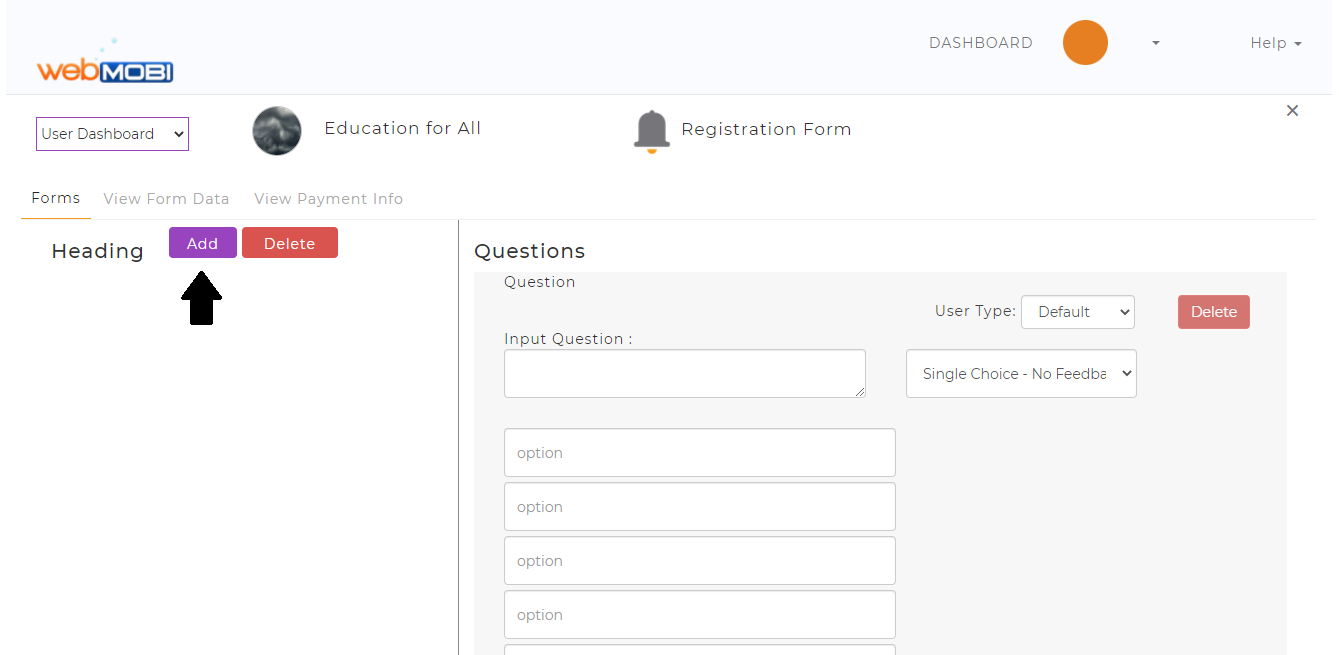
In the header pop-up, enter the header name and choose the user type.

Now click on the heading and enter the question, select user type, and question type.
User type:
Default – This question will appear in all user-type questions.
Attendee/ Exhibitor/ Media – These questions will appear only on the selection of that particular login type.

Question type:
Single choice with feedback
Multiple choices with feedback
Single choice with no feedback
Multiple choices with no feedback
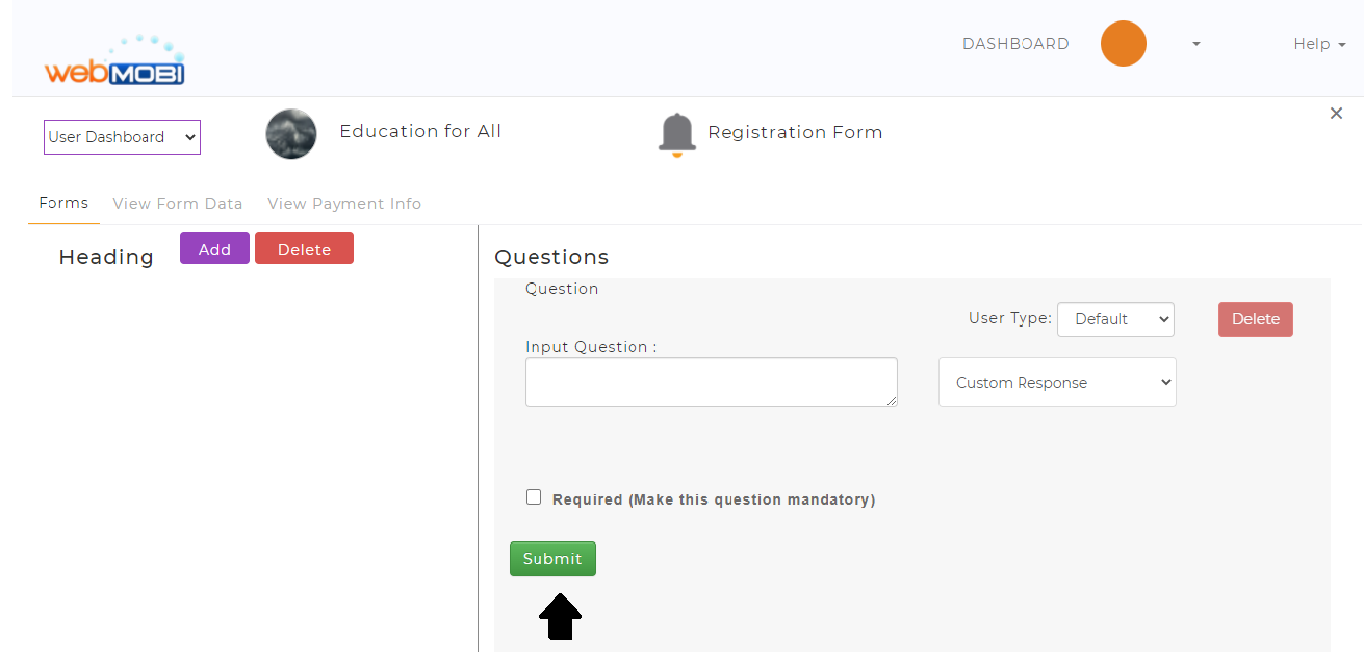
Custom response

The user also has the option to mark it as a mandatory question by checking the “Required” checkbox.
Click on the “Submit” button to add the question.
Note:
Once the question is submitted, it cannot be edited.
To add a question, at least a heading is necessary.
Click on the Submit button and Publish it to see it live on mobile event apps.