
webMOBI Administrator Guide

Unit 1 - Basics
Unit 2 - webMOBI Platform Overview
What is webMOBI?
Unit 3 - Starting up with webMOBI
Event Registration
Add Tickets
Unit 4 - Adding Speaker Details
Unit 5 - Adding Agenda details
Unit 6 - Adding Social Media
Unit 7 - Adding Exhibitors
Unit 8 - Adding Sponsors
Unit 9 - Adding Video
Unit 10 - Survey
Unit 11 - About Us (WYSIWYG HTML Editor)
Unit 12 - Contact Us
Unit 13 - Banner Ad
Unit 14 - Document
Unit 15 - Activity Feed
Unit 17 - Gallery
Unit 18 - Attendee
Unit 1 - Basics
Introduction:
webMOBI is a comprehensive event engagement platform designed for crafting in-person, virtual, and hybrid event experiences. This guide has been curated for event organizers aspiring to self-publish their events. The guide is divided into 17 distinct units, each detailing a unique facet of the event publishing process.
Accessing the webMOBI Dashboard:
1. Navigating to webMOBI:
Launch your preferred web browser.
Enter the URL: [https://webmobi.com/](https://webmobi.com/) to land on the webMOBI Home Page.
2. Dashboard Access:
Locate and click on the "Dashboard" link, situated in the top-right corner of the homepage.
A popup will appear. Click on the 'Go To Login' button within this popup.
3. Logging In:
If you're an existing webMOBI user:
Enter your registered email ID.
Input your password.
Click on the 'Login' button. You can also log in using OTP/Code which will be provided on your email
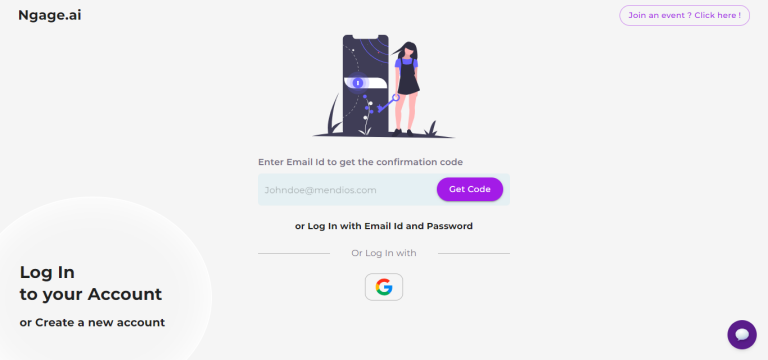
If you're a first-time user:
Look for the "Sign up here!" option on the login page.
Clicking this will redirect you to the registration page.
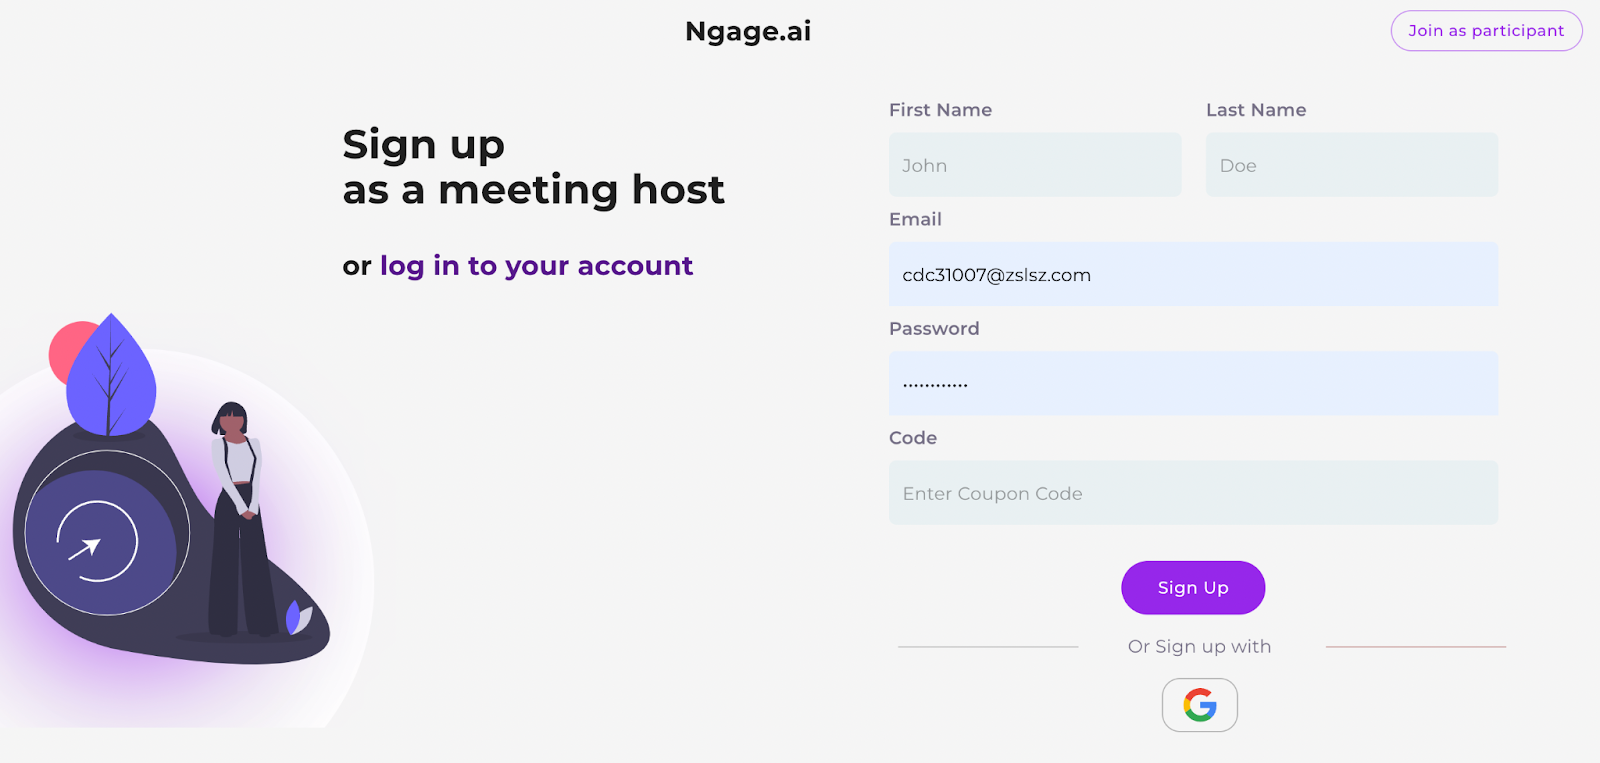
Signing up to webMOBI Dashboard:
Click on the dashboard option at the top right corner on the webMOBI website Homepage, which will redirect you to the user login page.
Click on the “Sign Up here!” option, and you will get redirected to the registration page, as seen below.
Enter all the required fields and click on the sign-up button.
The Admin will get the confirmation email on Successful Completion.
Now you can log in to your dashboard with your login credentials.
Adding an Admin to Your App on webMOBI
Prerequisites:
Before assigning admin privileges, ensure the user is registered on the webMOBI platform.
1. User Registration:
Direct the user to [https://app.webmobi.com](https://app.webmobi.com).
Ask them to complete the registration process.
Adding an Admin:
2. Access the Dashboard:
Log in to your webMOBI dashboard.
3. Select Your App:
Navigate to the specific app you wish to add an admin to.
4. Assign Admin Role:
Locate and click on the 'Add Admin' or equivalent option.
Input the registered email ID of the user.
Confirm the addition.
Note: Always ensure the user has completed the registration process before assigning them as an admin. This guarantees they have proper access and functionality within the app.
By following these guidelines, you'll ensure a smooth transition of roles and maintain the integrity of your app's management.
System Requirements needed
Platform Overview:
webMOBI is a cloud-centric platform that's compatible with the majority of web browsers. For a smooth experience, users only need to have a browser that's compatible and a stable internet connection. For optimal results with the webMOBI dashboard, we suggest using the Chrome browser.
Understanding the Basics:
To maximize the benefits of the webMOBI event management platform, it's essential to familiarize yourself with some core concepts related to both the backend and frontend. This will equip you with a holistic understanding of the platform, covering aspects like website development, event app creation, registration, and ticketing.
Dashboard:
The dashboard is a pivotal area within the platform that is primarily accessed by the Admin, a registered user of webMOBI. The Admin has the capabilities to:
- Craft an event app or website.
- Enlist attendees, speakers, exhibitors, and event sponsors.
It's crucial to note that only users registered on the dashboard (typically event organizers) can access this section. Regular participants or attendees will not have access unless they have been specifically added and provided with admin rights by the primary Admin.
Event Types:
webMOBI is versatile, extending support to a range of event formats including in-person, virtual, and hybrid events.
Streaming Portal:
webMOBI has a streaming portal that enables live streaming events with the ability to have concurrent sessions in a branded portal
Website and mobile app:
All participants can access the application and the website. This does not require any authentication; the user needs to log in or register to the event app or website to access it.
Compatible browsers for website and streaming portal:
Google Chrome
Mozilla Firefox
Safari
Microsoft Internet Explorer (Version 9 and above)
Compatible devices for the mobile app:
iOS
Android
The dashboard features cannot be optimized on mobile devices but can be optimized on the Desktop and Laptop. The website and app are compatible with mobile and can be accessed from there.
Compatible browsers for the Dashboard:
Google Chrome
Unit 2 - webMOBI Platform Overview
What is webMOBI?
webMOBI is a new generation AI-powered all-in-one event management software that provides a suite of engagement tools for enterprises. webMOBI delivers a suite of event management software tools that includes event apps, website, registration, live polls, survey, lead generation services, & attendee engagement. Our cutting-edge software is trusted by 100 brands worldwide for corporate events, exhibitions, conferences, trade shows, internal/external meetings, & more.
SALIENT FEATURES
The branded streaming portal enables live streaming of virtual events and support for hybrid events
Mobile event apps give sponsors, a smarter way to promote their brand
Attendee networking
webMOBI Workflow:
1. LOGIN:
- Begin by logging in using the provided credentials or sign up if you're a new user to kickstart your journey with webMOBI.
2. Event Creation:
- Opt for an event type based on your requirements.
- Fill in essential details such as event title, description, duration, event name.
- You also have the option to enable or disable ticketing, preference forms, and more.
3. Feature Selection:
- Curate your event's w by choosing from our diverse array of event features. This will help in molding your personalized and branded event app.
4. Publishing Your Event:
- Once all the settings are in place, publish your event app and website to make it accessible to the target audience.
5. Invitations:
- With your event live, it's time to notify your audience. Dispatch email invitations to your potential attendees, urging them to be a part of your event.
6. Data Management:
- Use the Content Management System (CMS) to efficiently oversee and manage all the event-related data and details.
7. Platform Updates:
Stay updated with the latest features and improvements! Our platform frequently rolls out updates to enhance user experience.
Notification on Updates:
1. Receiving Update Notifications: When an update is available, a notification will pop up on your screen.
2. Action Choices:
Accept: Click on the notification to manually accept and initiate the update process.
Auto-refresh: If no action is taken, the platform will automatically refresh after a while to install the new updates.
Note: It's beneficial to ensure that you save any ongoing work to prevent any loss of data during the auto-refresh process. By keeping your platform updated, you'll be equipped with the latest tools and features to enhance your overall experience.
Unit 3 - Starting up with webMOBI
To create an Event
Once you are logged in, you can start creating the apps on the user dashboard. Click on “New Event”
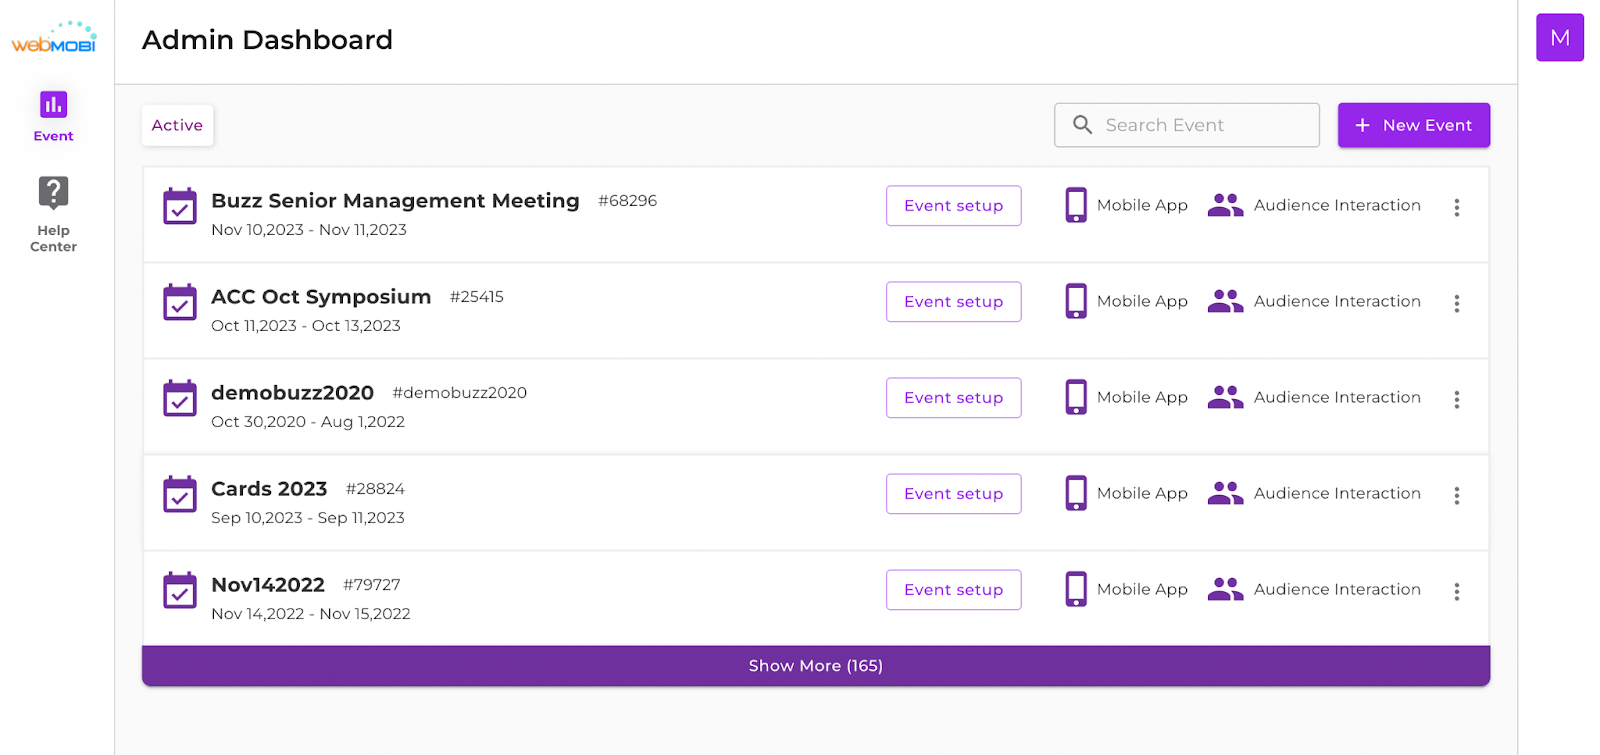
Click on the event and goto the Event Content
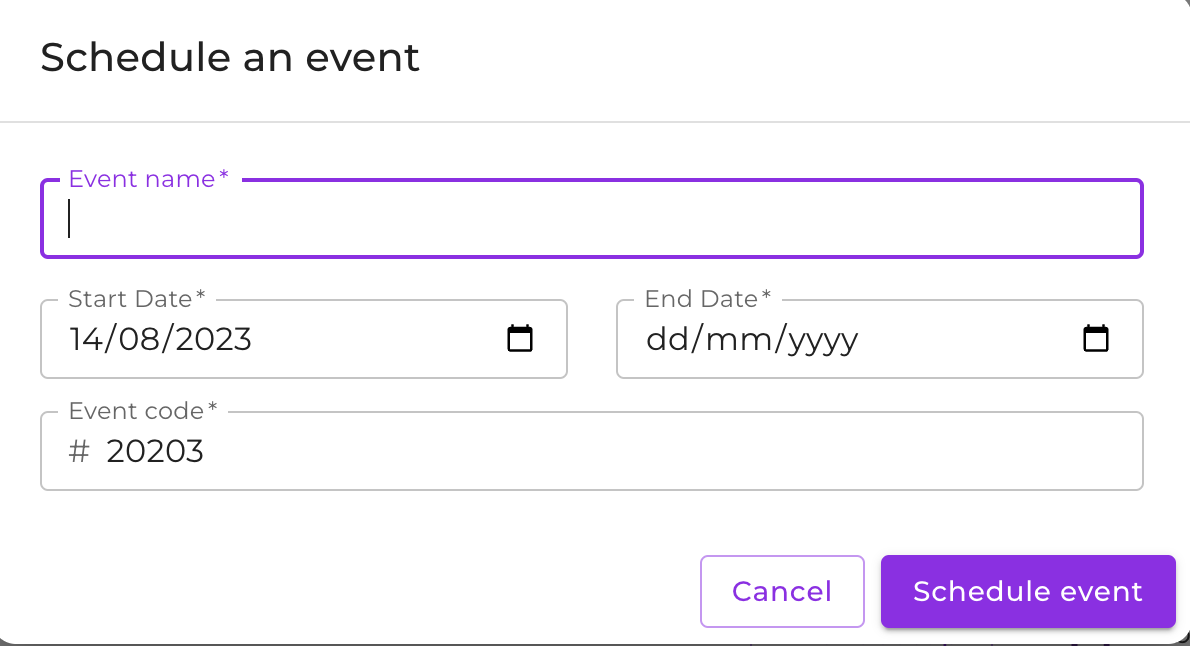
Basic Details
Title of the event
Description
Event name (Unique)
Organized by
Organizer website
Event start date and end date
Location
Banner image
Event logo
Click on ‘Save and Continue’ after entering all the Basic Information and Publish it. Once you publish the Event, it will show up in your Event Dashboard list.
Click on “Save and Continue” to publish the initial draft of the application.
Publishing multiple events
Under the Add Layout tab, you can find the name of your app with a dropdown option, on the left panel. Click on it and select the Add Event option to add a new event. Now once again provide the necessary information for the New Event. Click on the Save and Continue and publish the event.
Event Registration
Registration for your event is made easy with webMOBI's Registration feature. You can enable or disable it according to your needs. If you disabled the registration feature, you wouldn't be able to land on the registration page. You could distribute both paid and free tickets for your event if you enabled the registration process. Also, you can add questions in the registration form in our webMOBI's registration feature.
Add Tickets
Open the Event in the Dashboard.
Open the CMS module and click on the Registration Section.
On the Registration page, click on “Add Ticket.”

User can add two types of tickets:
Free Ticket
Paid Ticket
Free Tickets
1. Enter some basic details like Ticket name, Quantity, Type, etc, and click on the ADD option.
2. Admin will be able to see all the ticket details. Here there are three types of availability:
Available - Tickets are available
Halt - Tickets are blocked now
Hidden - Ticketing will not be shown.
3. In Action, click on the settings icon to edit or delete the Ticket.
In a Free ticket, the user need not pay. Here on the event website, the attendees can select the event and number of tickets and continue the registration.
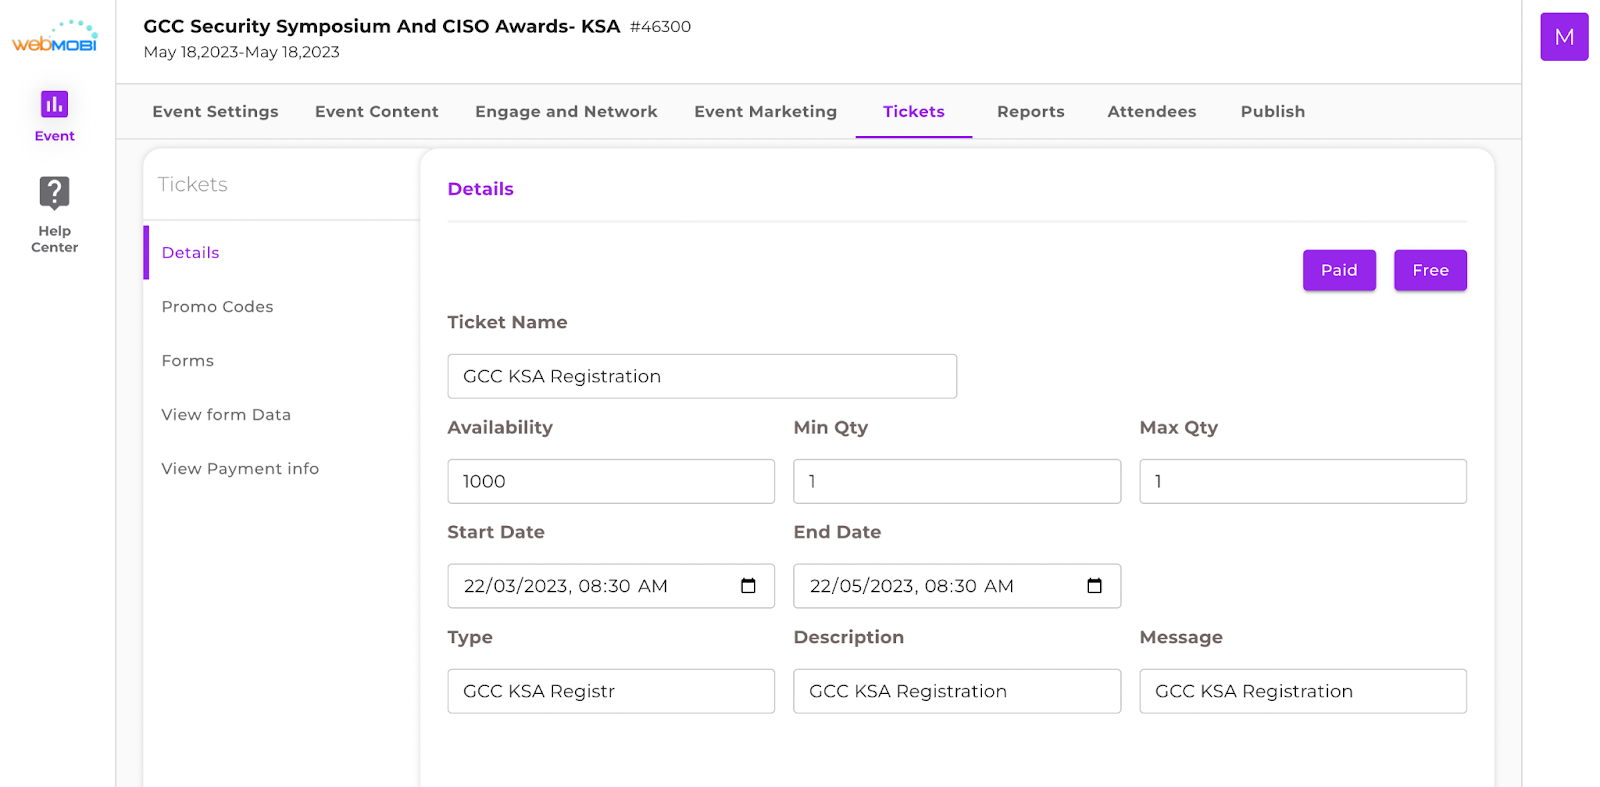
Paid tickets
Switch the button from Free to Paid ticket on the Registration page after tapping on Add Ticket option
Enter some basic details like
Ticket Name
Quantity
Type
Price
Currency Type
Payment to webMOBI and Gateway fee:
Sales start date and end date
The Admin can specify a particular start and end dates to start and end his sales
Before the sales start date, the attendee cannot register or buy the Ticket.
Ticket description
Message for attendees

Clicking on “ADD” users will be able to see all the ticket details.
Here there are different modifications to do on tickets as and add coupons:
Available - Tickets are available.
Halt - Tickets are blocked now.
Hidden - Ticketing will not be shown.

Click on Save and Continue, and the ticket information will get reflected on the website.
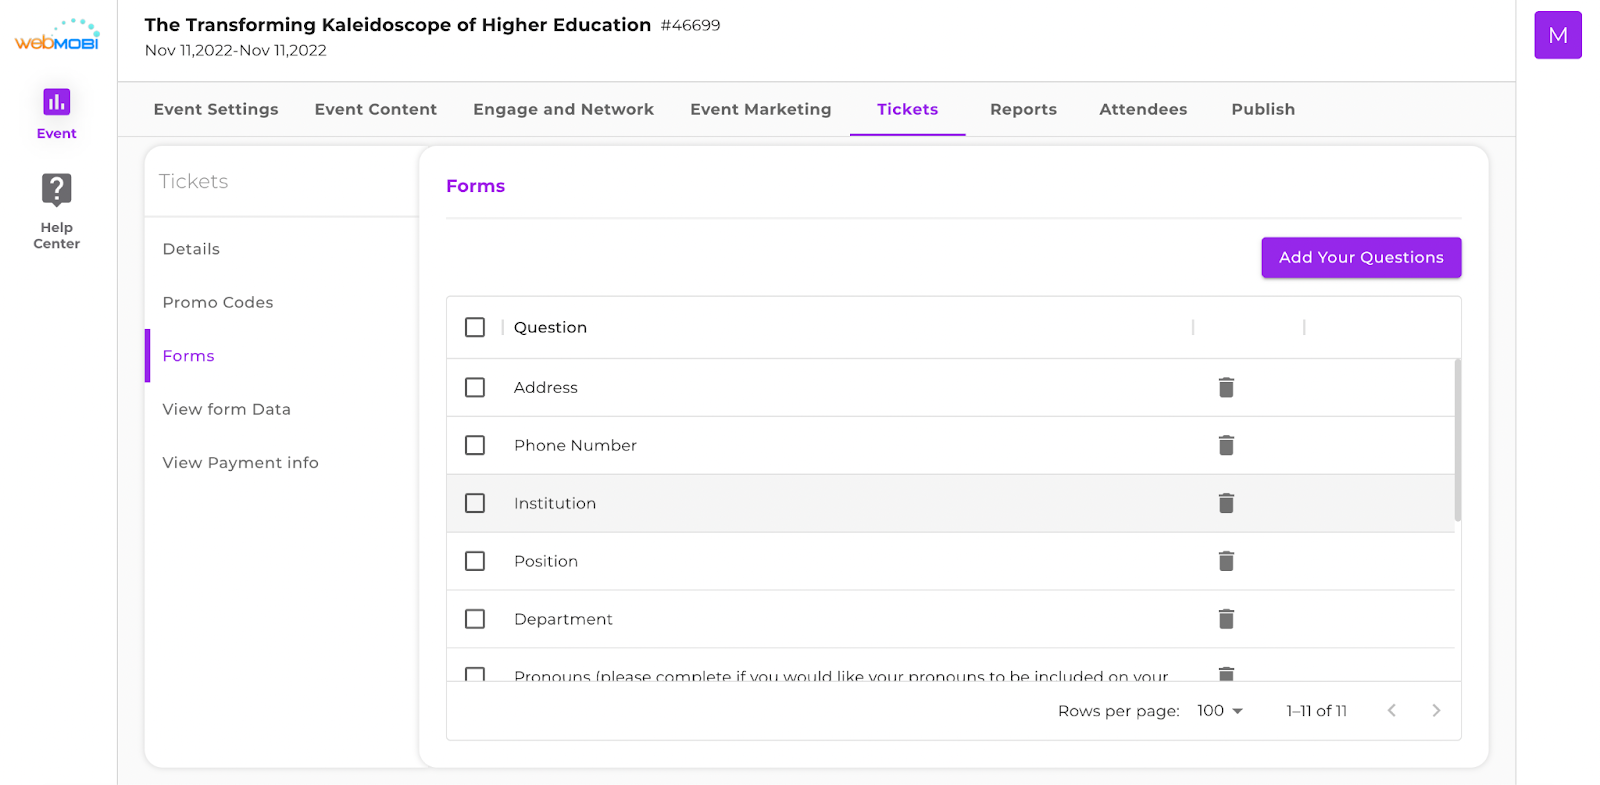
Now the user can add the question to get the attendee data on the website registration page.
Registration form questions
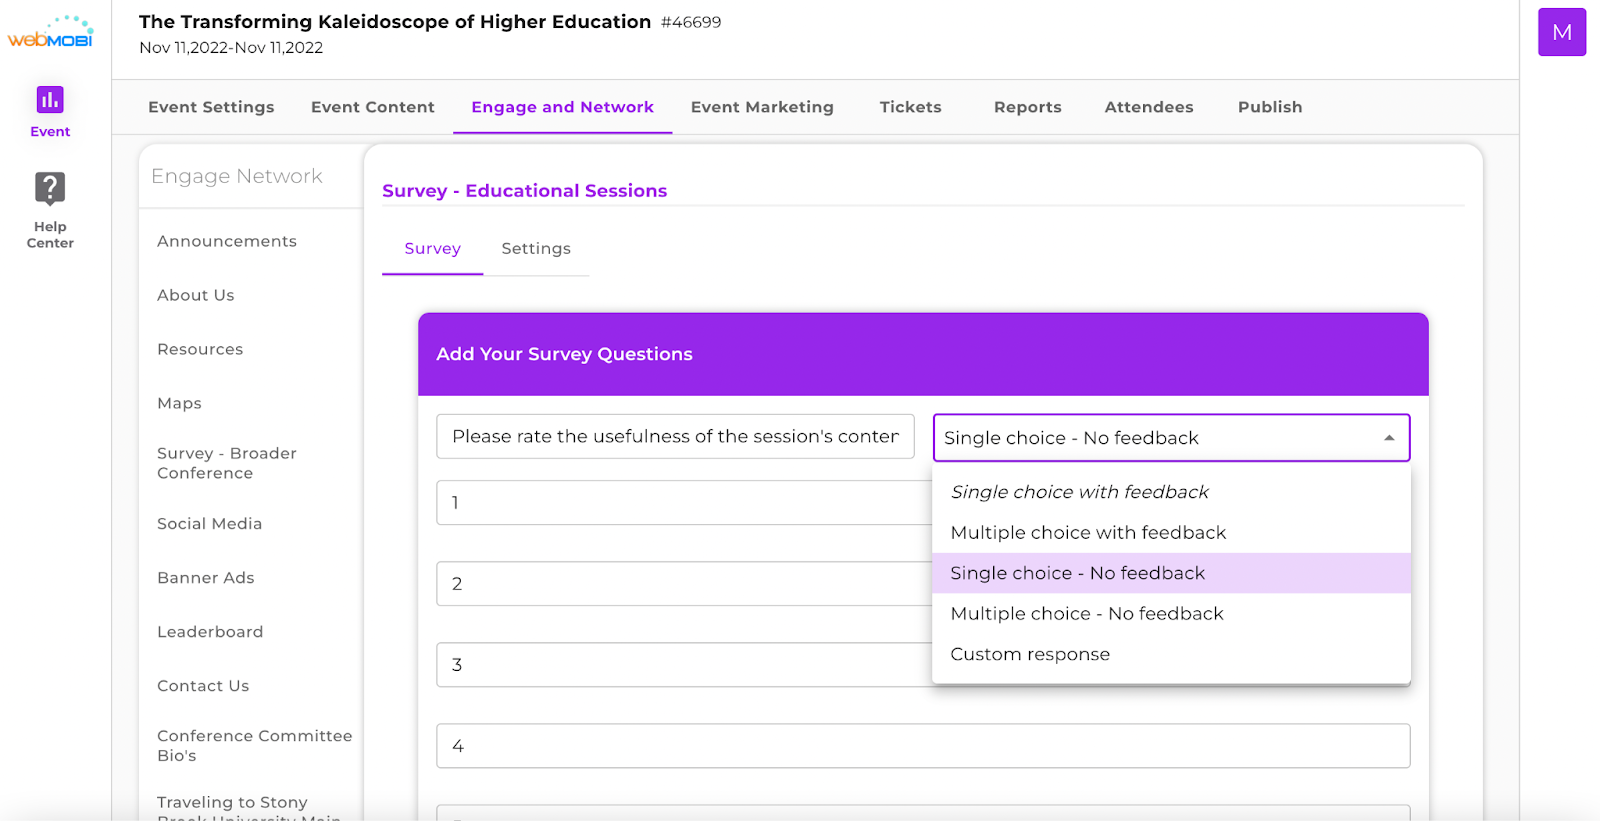
Here user can add some questions for the registering people, and can select the type of question from different options as below:
Single choice with feedback
Single choice without feedback
Multiple choices with feedback
Multiple choices without feedback
Customer response
Select the “Tickets” module and goto the form feature to input the questions for registration.

Question type:
Single choice with feedback
Multiple choices with feedback
Single choice with no feedback
Multiple choices with no feedback
Custom response
The user also has the option to mark it as a mandatory question by checking the “Required” checkbox.
Click on the “Submit” button to add the question.
To add another question, click on the “Add” button.
Managing Questions in the Registration Form
Introduction:
When setting up your registration form, it's important to understand the capabilities and limitations regarding question arrangement.
Reordering Questions:
1. Limitation: The platform currently does not support the direct reordering of questions once they are entered.
2. Alternative Solution:
If you need a question to appear in a different order:
Delete the specific question from the form.
Re-enter the question at the desired position.
Note: Ensure you note down or copy the original question and any associated options or details before deleting it, to ensure accuracy when re-entering.
By following this approach, you can effectively manage and organize your registration form questions to best suit your event or activity.
Multi-event support
For displaying all events within a single mobile app, they should be configured using the multi-event setup. This ensures that when users log in to the app, they can view information for all relevant events.

Unit 4 - Adding Speaker Details
Adding Speaker and linking it with the Agenda
It is important to first upload the speakers and then link them to the agenda. If the speakers are uploaded after uploading the agenda, then the speakers won’t get linked with the agenda properly.
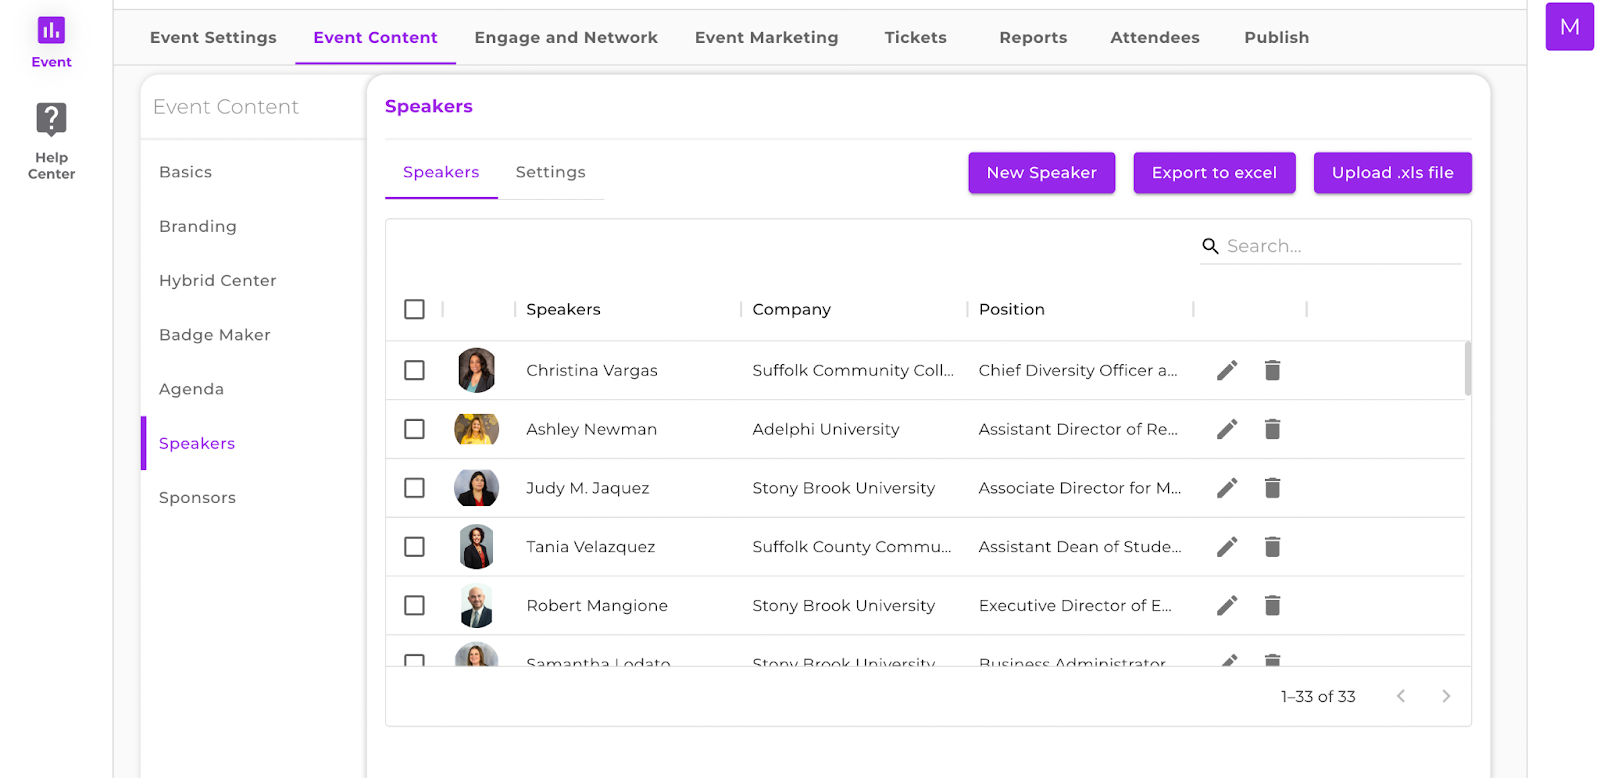
For uploading the speaker, first, you need to go to the speakers tab
Once you are on the dashboard, click on the “Speakers” tab to open the speaker form.

There are two options to upload the Speakers on the dashboard
Adding it Manually
Uploading through the XLS sheet
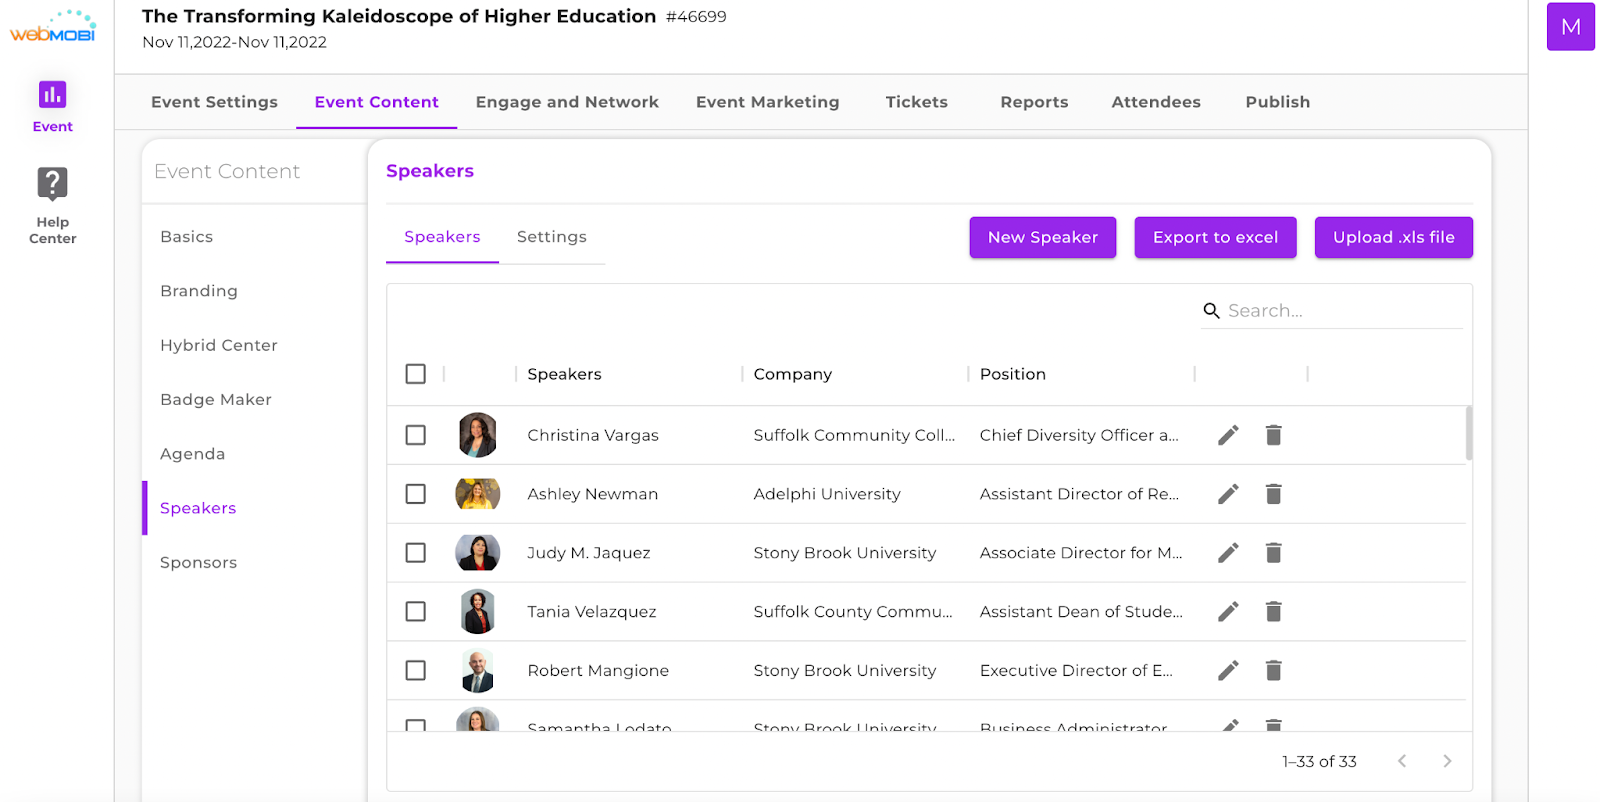
Adding Speaker Manually
After you open the Speakers tab, click on the “New Speakers” option in the top panel.

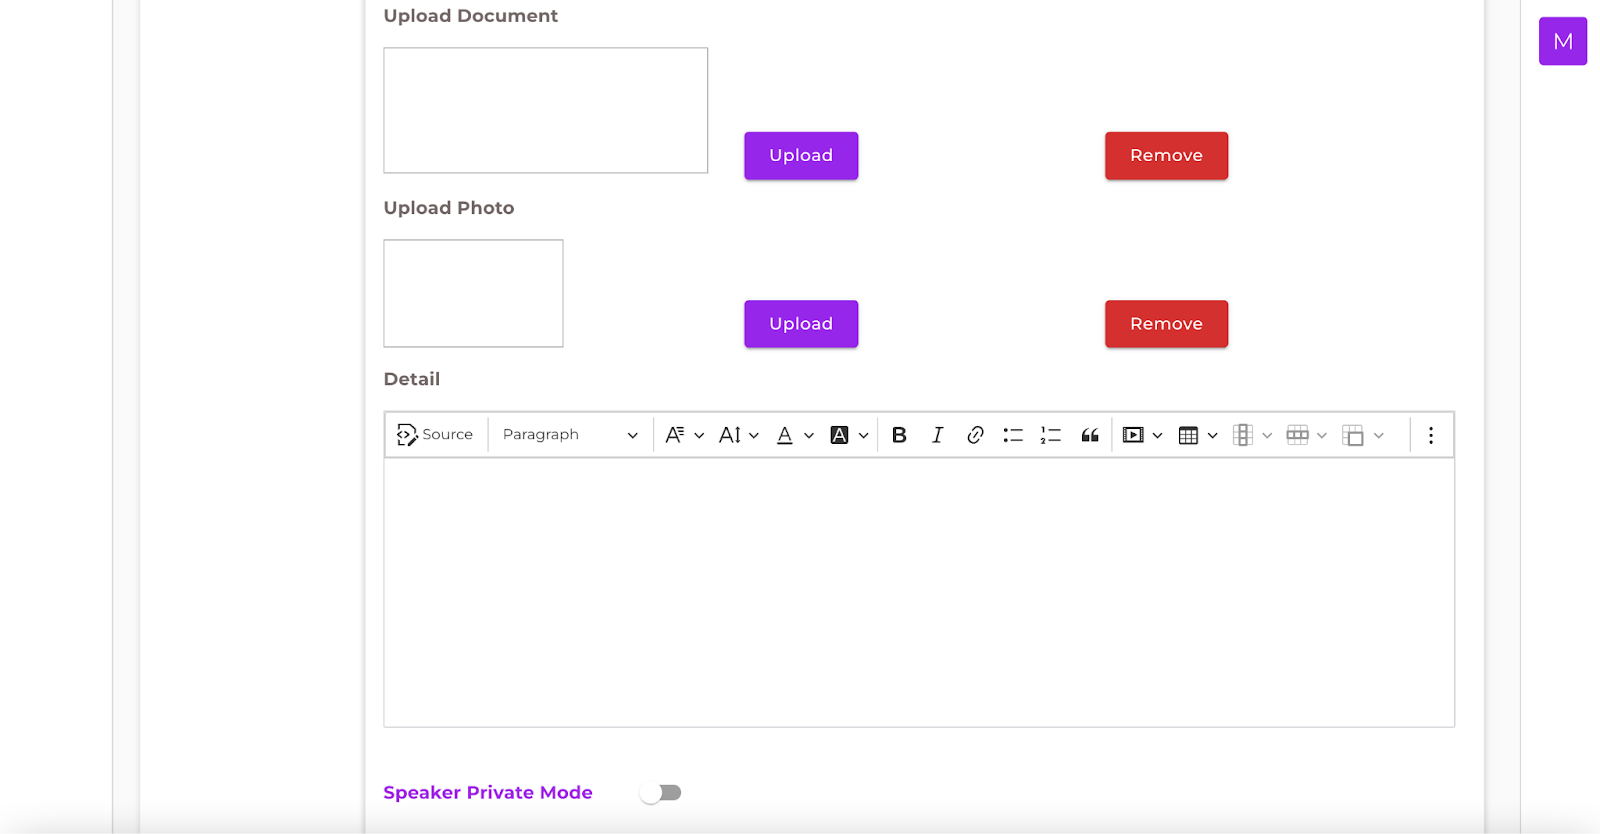
You will see a speaker form. This form consists of the following details:-
Speaker Name
Company
Position
Social Media links (Facebook, Linkedin, Instagram, Twitter)
Speaker image (Upload from local storage)
Speaker Description
Once all the details have been uploaded in the form, click on the “Save” button and your details would be saved.
Once you have saved, click on the “Publish” button, and your details would be saved and published.
Adding through the XLS file
For uploading the speakers through the XLS file, you would need to click on the “Upload XLS” button.
Note: This method helps you to upload the speaker’s information in bulk.
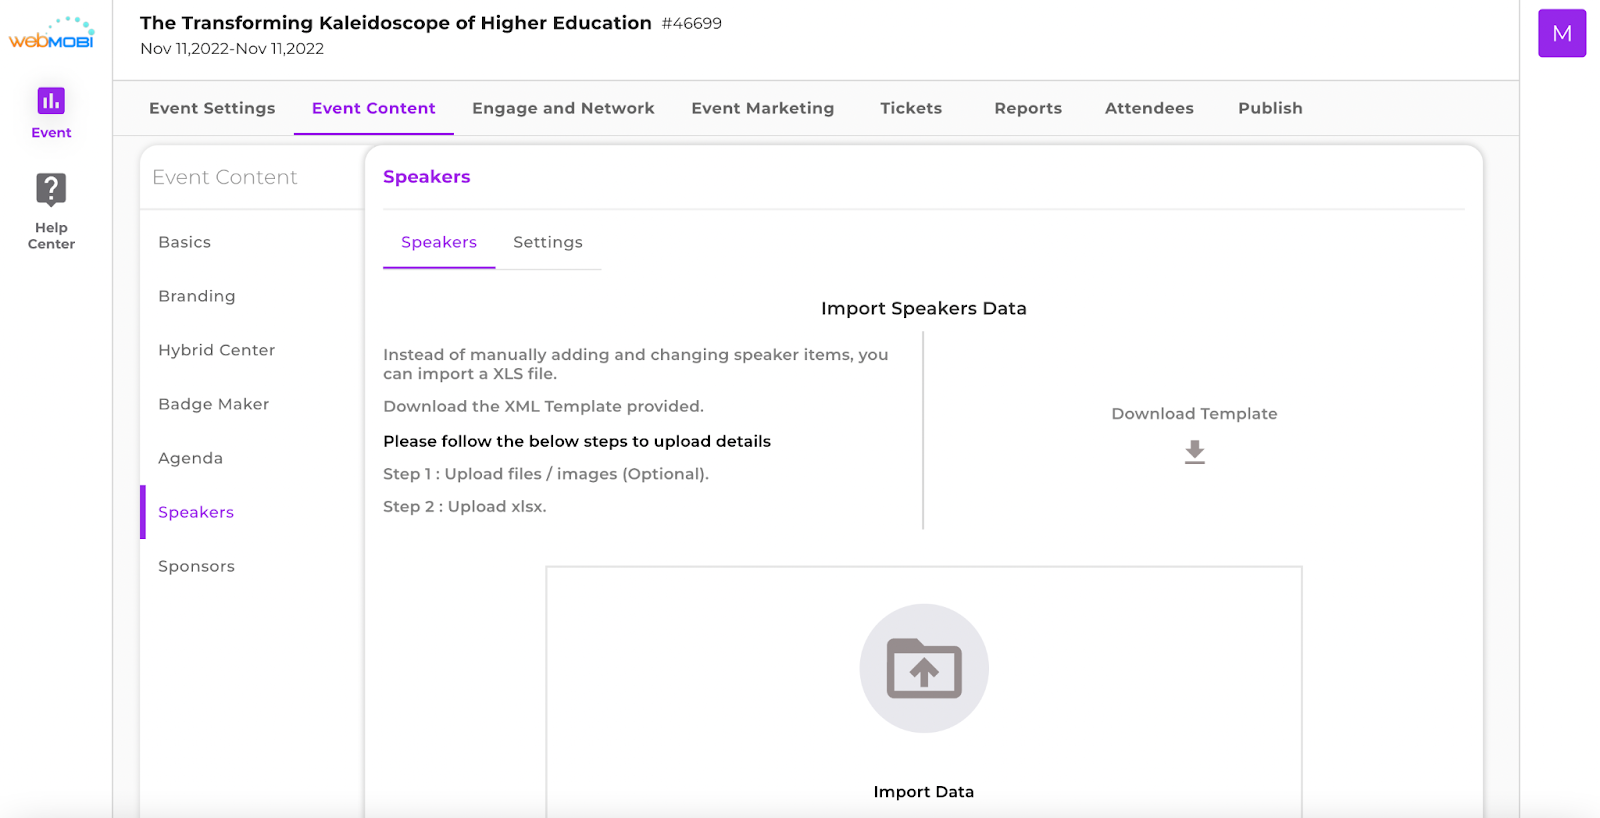
Click on the “Download Template” option to download the excel template in which you need to fill in the speaker's information.
You can upload the images of the speaker in the upload files section. For that, you need to put all the pictures of the speakers in a folder with their exact corresponding names and convert that folder into a zip file. You will then need to upload the zip file.
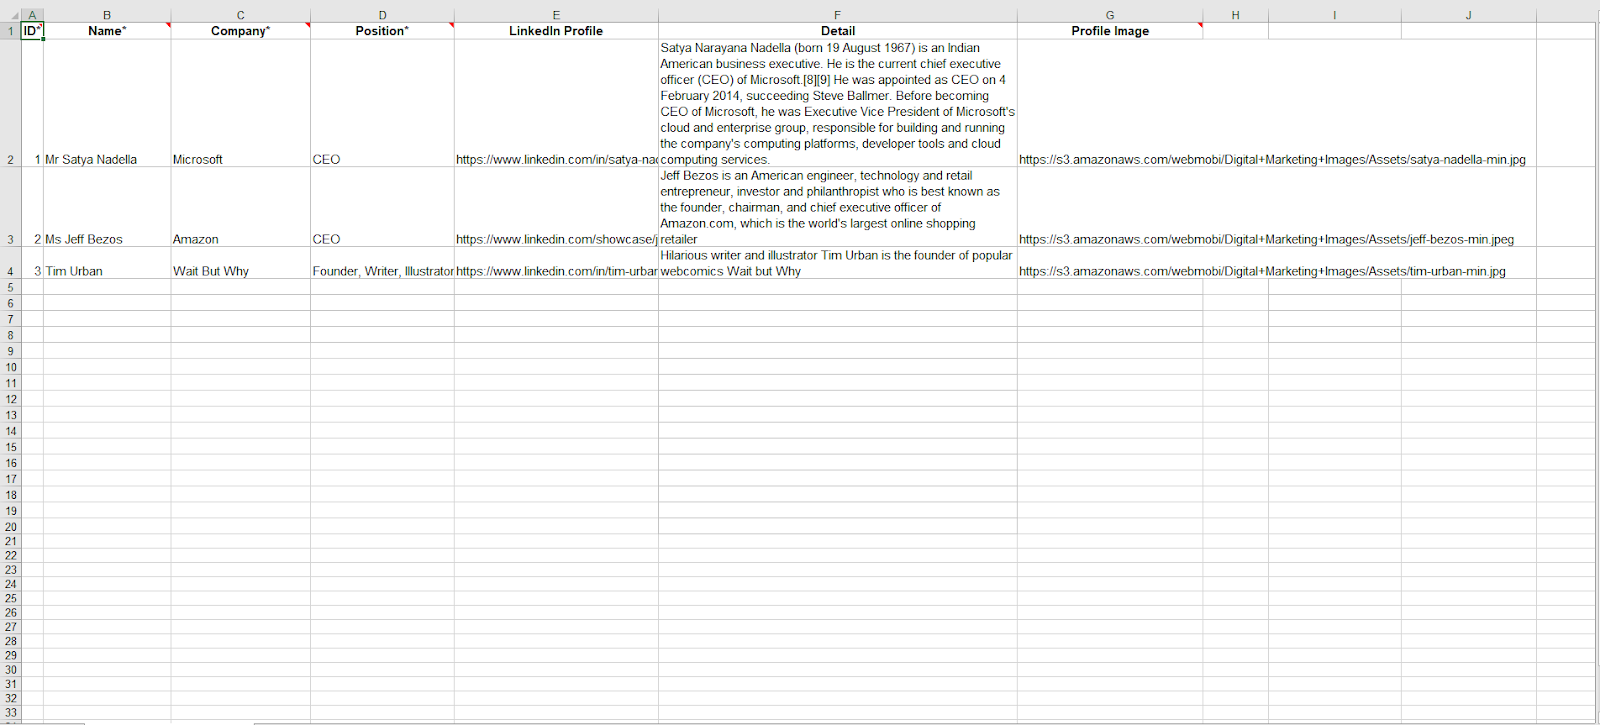
Fill in the speaker details in the template according to the format provided to make an XLS file that you can upload. To map the zip photos with the respective Speaker, you have to name the profile image column according to the speaker.
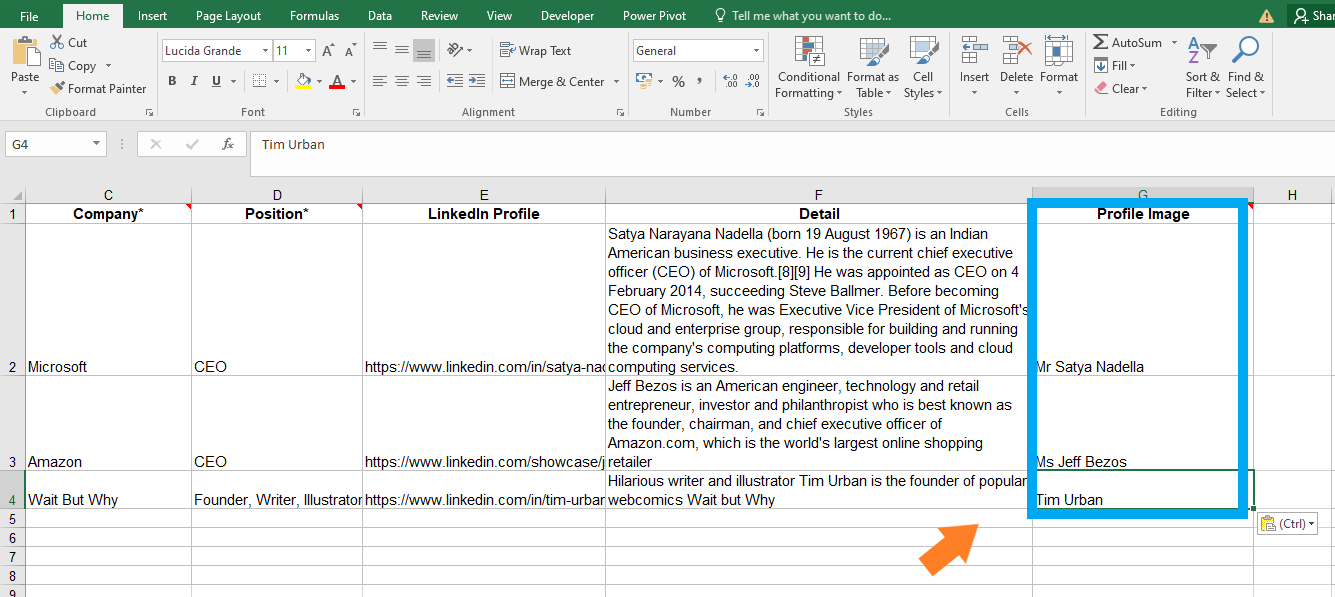
Points to follow in Template
1. The ID column should be in increasing order.
2. Name, Company, Email, and Position are mandatory fields.
Once you are done with all this, you can upload the XLS file by clicking on the “Upload XLSX” button and browsing to choose the specific file.
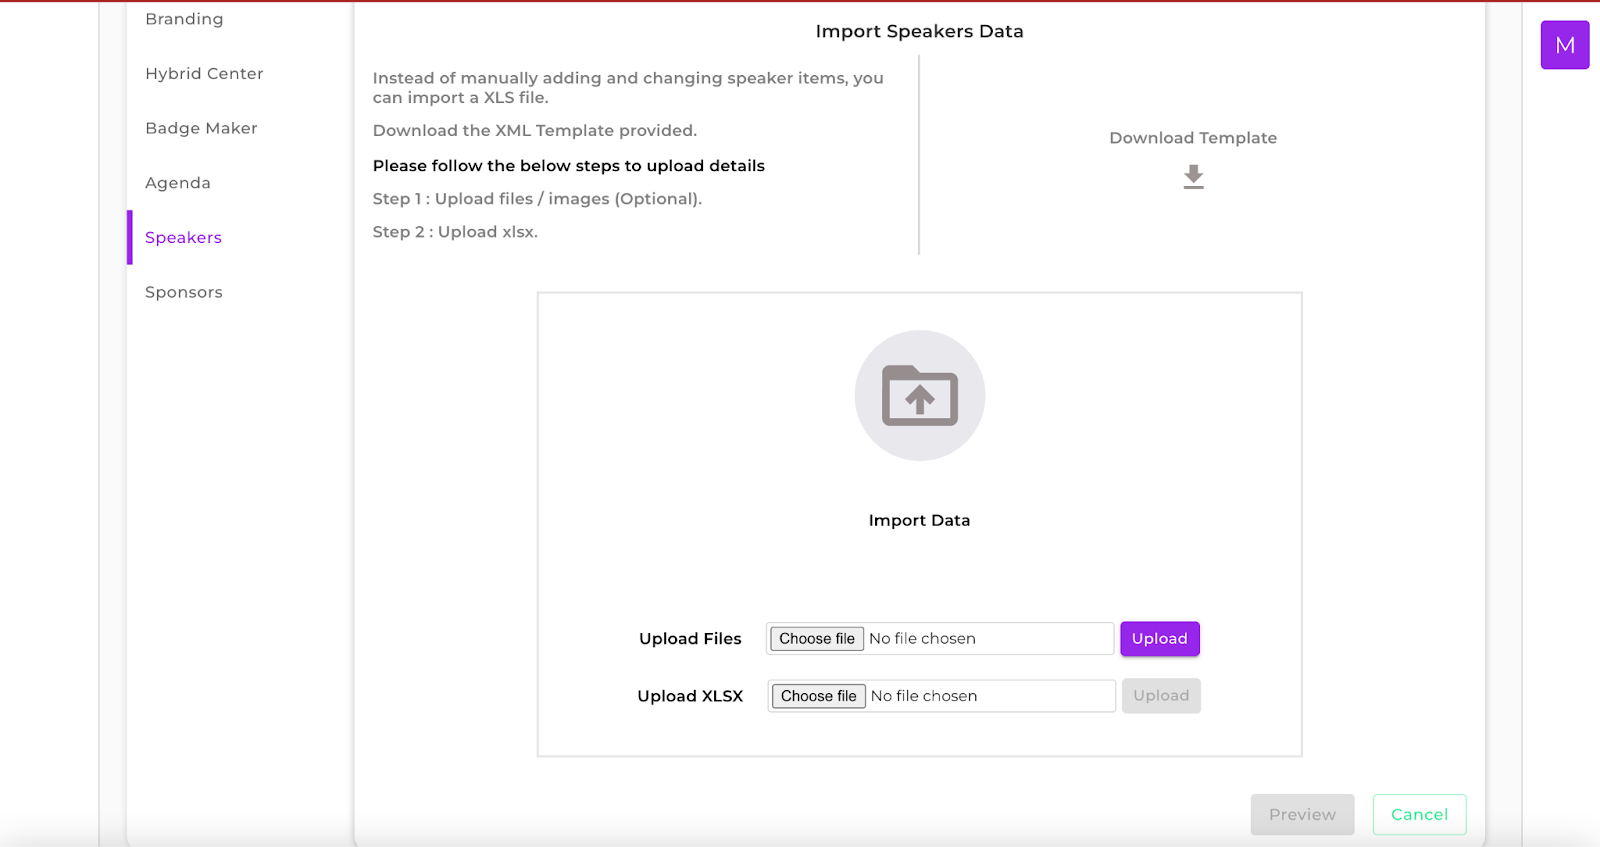
After uploading, you’ll get a pop-up indicating that “Speaker details Saved successfully”. You can save and publish this and you would be good to go with your speaker details.
How to Export Speaker details
In the Speaker section, click on “Export to Excel” and you would be able to download the speaker excel file.
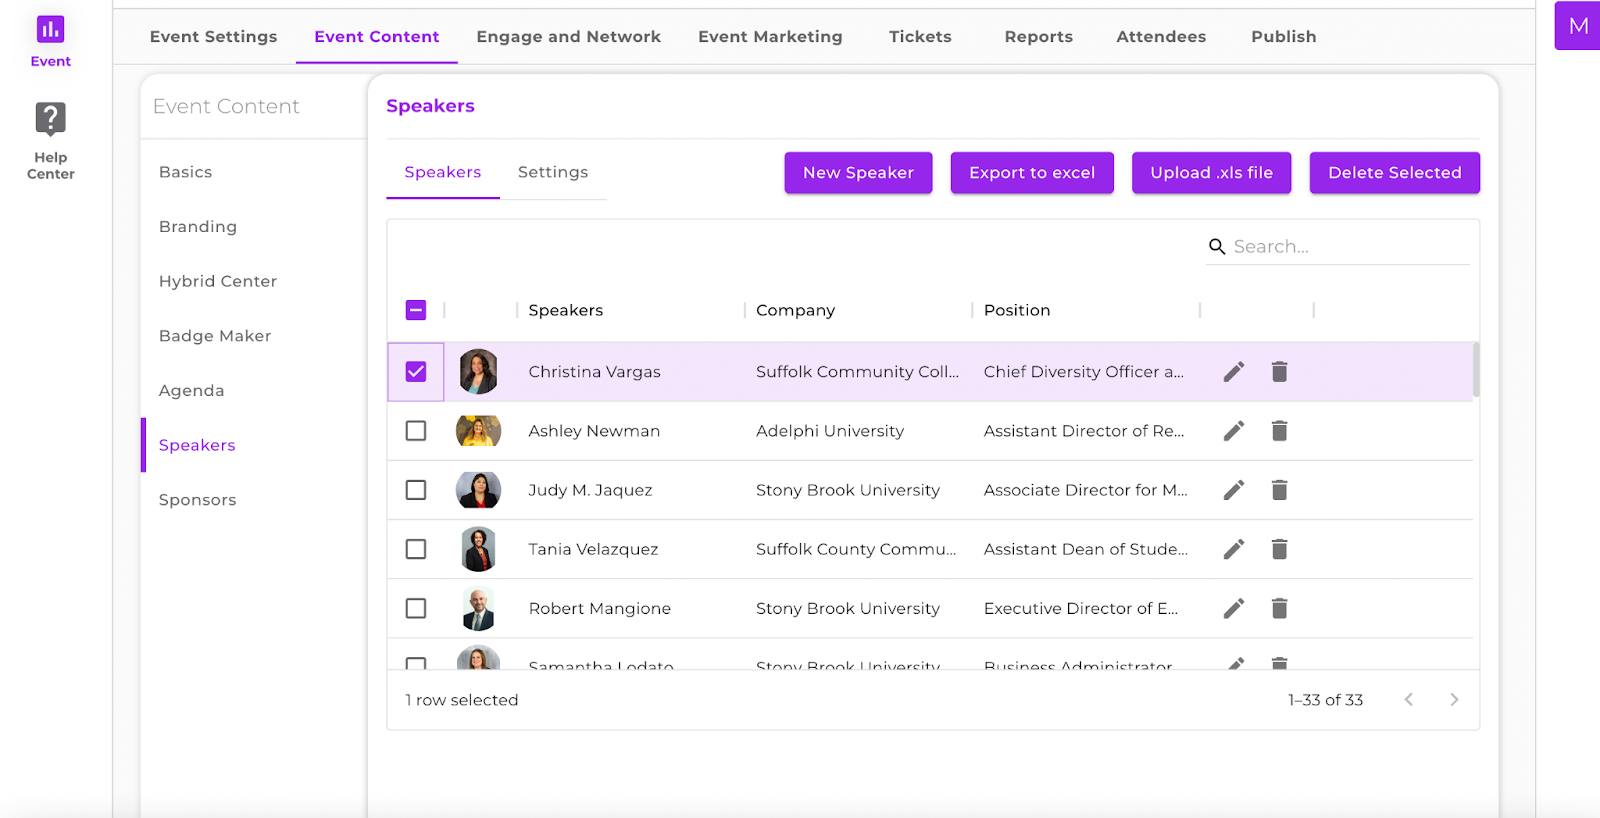
How to Delete a Speaker
You can delete a speaker by selecting them through the left side checkbox. Once you have selected a certain speaker, you can delete that speaker by clicking on the “Delete Selected” button.
Adding Speakers to the Agenda
You can add speakers to a particular Agenda by clicking on the Edit option from the dropdown of an Agenda. Open the form and add the speaker to the Specific Agenda from the list in the dropdown.
You can edit the Agenda by clicking on the “settings” button and clicking on“Edit”.

You can add/change the Speaker in the “Speakers” tab while editing the form.

Click on “Edit” and then Publish the Agenda.
In XLS Sheet: Open the agenda Excel file, add the speaker in the specific column, then upload and save it, and then publish it.
After that, you can see the speaker in the agenda session on the device.
Unit 5 - Adding Agenda details
Once you are logged in to the dashboard, click on your event and look for the “Content Management System” option in the user dashboard.
For uploading the agenda details, click on “Agenda” on the left panel of the CMS Dashboard.
There are two methods of uploading the Agenda in the Agenda Menu:
Adding agenda manually.
Uploading bulk agenda through an Excel sheet.
Adding Agenda Manually
Once you are in the Agenda Menu, Click on the “New Session” button which will lead to the form containing Session Details.


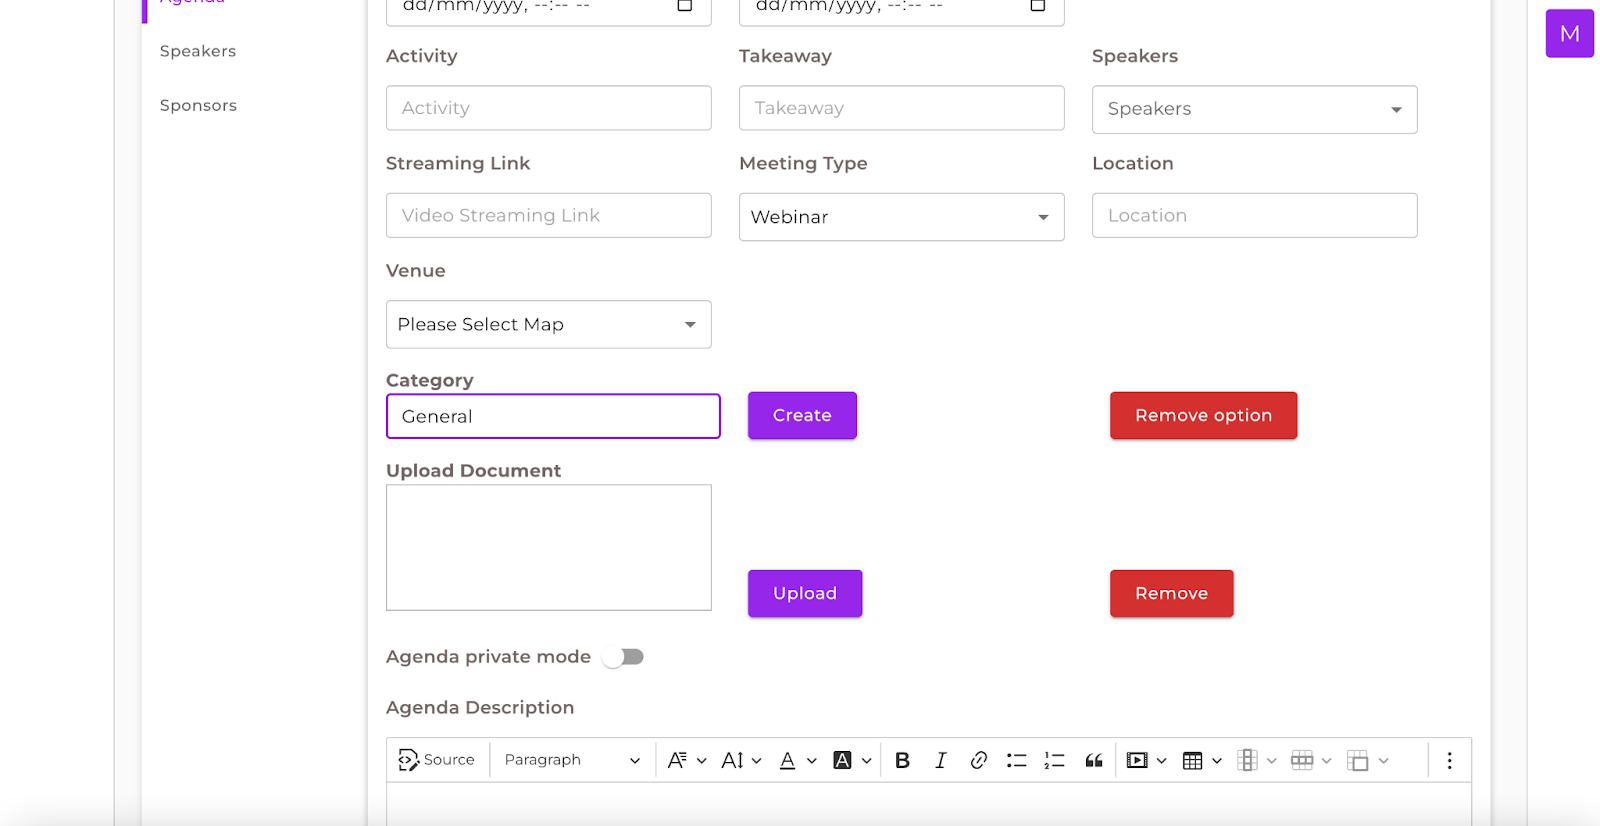
In the “Session Details” Menu, you would need to fill the following Session Details
Name of the Session
Duration of the Session(This must Include the Start and End Dates with the Respective Timings)
The Name of the Activity
The Speaker( The Option of all the previously added Speakers would be visible here. You can choose the Speaker for the respective Event)
Location of the Event
Takeaway
Venue(You can decide if you want to add more than one Venue except for the already specified Location)
Video Streaming Link
Meeting Type(Webinar / Meeting / Moderation / Automation)
Category (You also have the option to add new categories)
Description of the Session
Click on the “Save” button once you are done uploading the Details

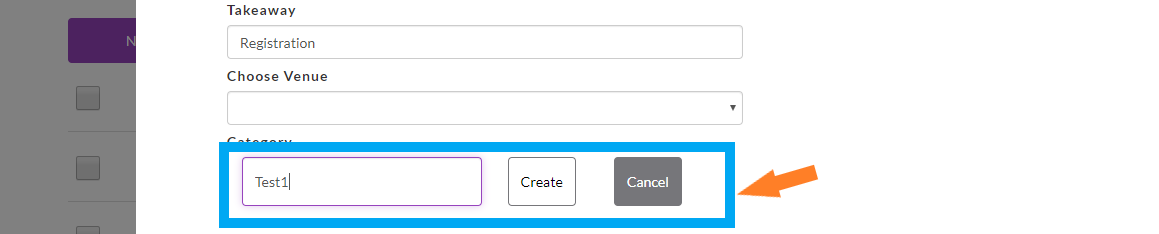
You can also add categories in the form by clicking on “+Category” and typing out the new category. Click on “Create” and your new Category would be saved.
Note: Assigning agendas to different categories will help to create private sessions so that only specific users connect to them.
Adding Agenda through XLS(Excel) Sheet
You can bulk upload your Agenda through the “Upload XLS” button on the Agenda Menu. This will enable you to upload the agenda through a template that will be in the format given below.

You can either upload an excel sheet strictly as per the above headings or download the Template through the “Download Template” Option in the Upload XLS Menu. This step is really important as the XLS doc that you upload must be formatted according to the template

Please Consider these IMPORTANT points while updating the Agenda Information in the XLS Spreadsheet
ID column should be in increasing order (1 2 3 ..)
The topic can be alphanumeric.
The category can be user-defined.
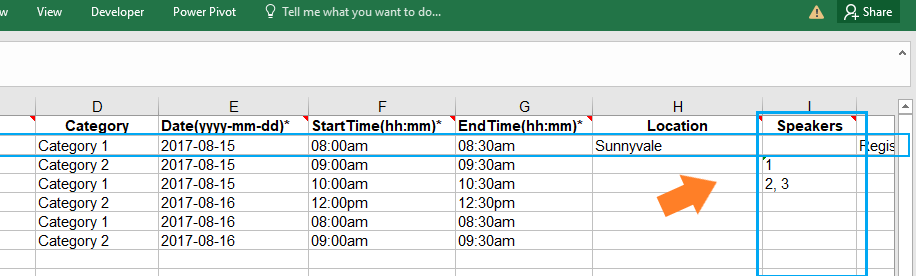
The date should be in the format (yyyy-mm-dd)
Start time and End time should be in the format (hh: mm), i.e., 08:30 am or 12:00 pm.
Note: Start time and End time; both are compulsory.
Location can be user-defined
Speakers: Here speaker ID should be mentioned in that particular column. For more than one speaker user can specify speaker Ids separated by the comma (like 2, 3).
Note: Mentioning the speaker's name will not be accepted.
Speaker IDs should be taken from the previously uploaded speaker template.
The takeaway can be user-defined.
Note: Please do not edit column headers

In the Upload XLS Menu you will see single option:-
Upload XLS
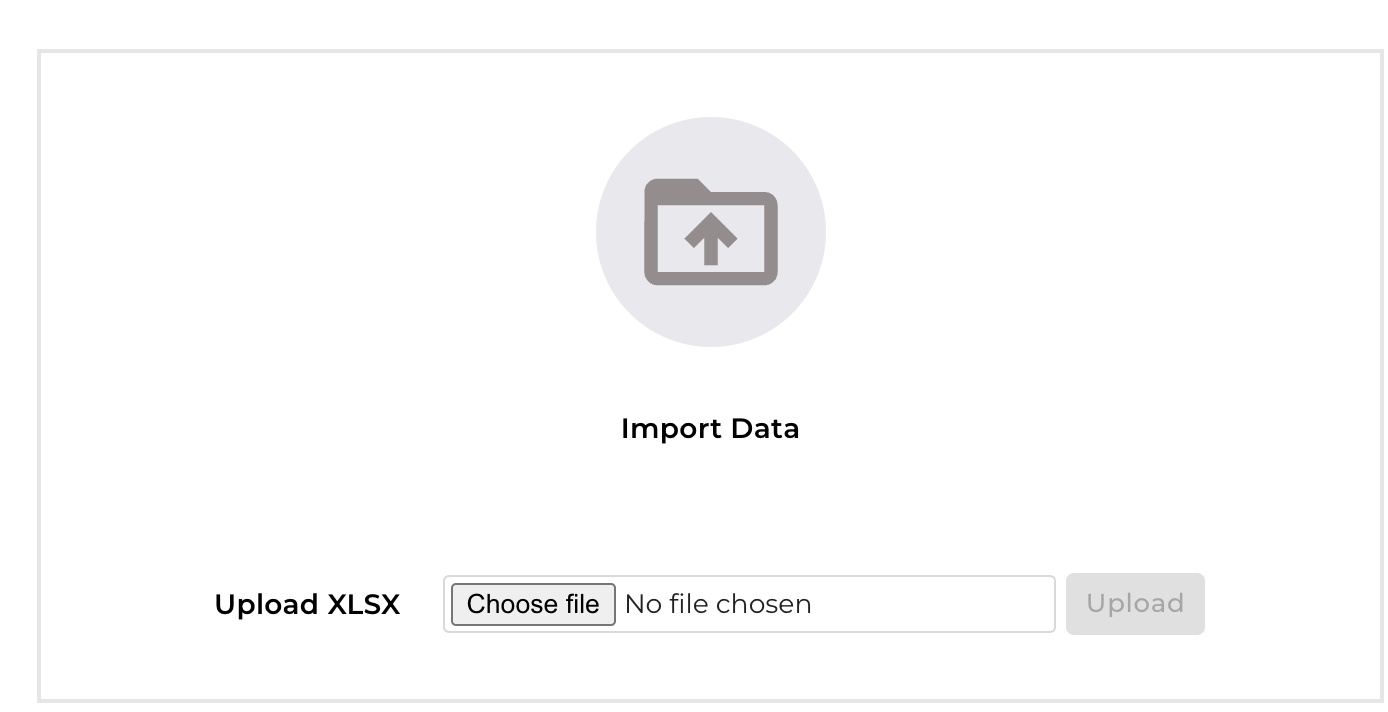
Upload XLS
Here, you can upload the bulk Agenda Excel file in .xls format by clicking the Choose File button. Select the excel from the local directory and then click on the Upload button.
You will then see a successful pop-up message saying “Agenda details saved successfully”.
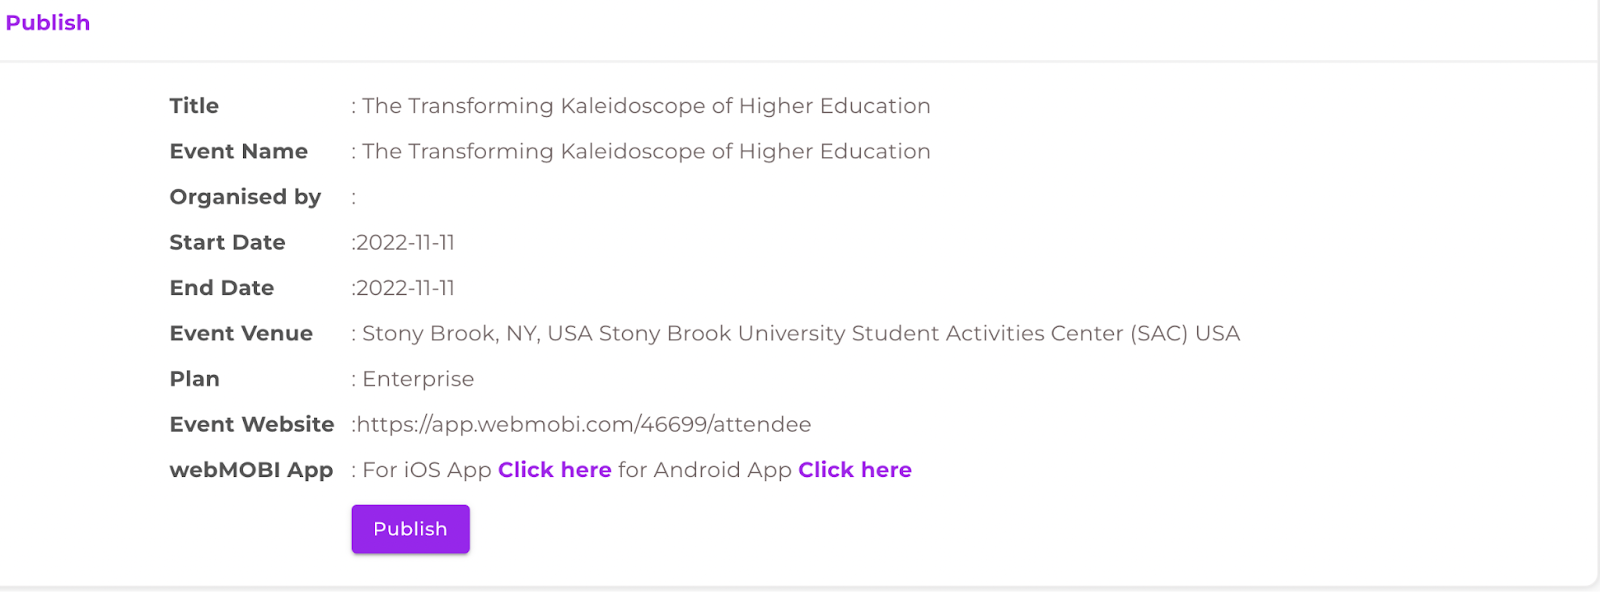
The added agenda(s) would start showing in the Agenda Menu in the dashboard. You will need to Publish the Agenda by clicking on the “Publish” button to make sure that your Agenda starts appearing on the Streaming Site and Mobile App.
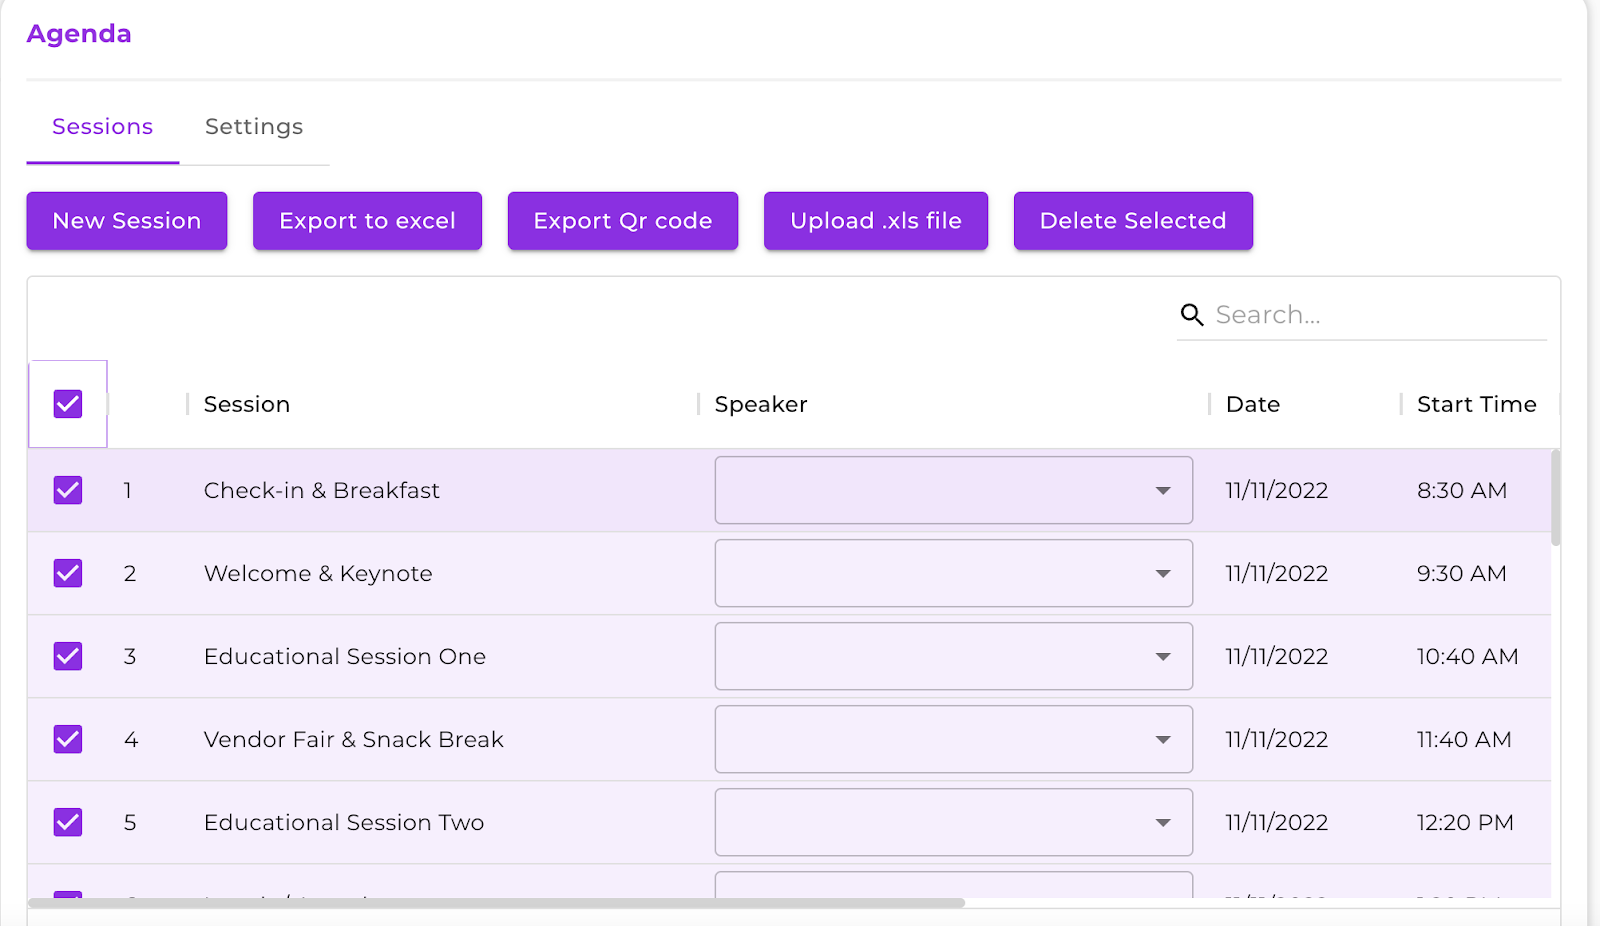
In the “Export to Excel” option, you can download all the agendas in an excel format file, similar to the one uploaded in the Upload XLS file

In the “Delete Selected” option, you can delete the selected session. To select a session you need to select the leftmost checkbox. Once selected, you can delete the session by clicking on “Delete Selected”. Upon deletion, you would receive a confirmation pop-up. Click OK and your selected session would be deleted.
Unit 6 - Adding Social Media
Adding Social Media Links to Your Admin Dashboard
Introduction:
Integrate your social media directly from the admin dashboard for better accessibility and outreach.
Accessing the Social Media Module:
1. Navigating to the Dashboard:
Log in to your admin dashboard.
On the home screen, find the left panel.
2. Selecting the Module:
From the left panel, click on the "Social Media" module.
Manually Adding Social Media Links:
3. Starting the Process:
Within the "Social Media" module, find the "Select your option" dropdown menu.
4. Choosing the Platform:
Click on "Select your option".
From the dropdown list, pick the specific social media platform you wish to add.
5. Inputting the Link:
Once the platform is selected, input or paste the corresponding social media link in the provided field.
6. Saving the Link:
After adding the link, click on the "Save" button to finalize and store the information.
Note: Ensure the links are accurate and functional to direct visitors correctly. You can repeat the process for adding links to multiple social media platforms. By integrating your social media through the admin dashboard, you provide visitors easy access to your online presence across various platforms.


Unit 7 - Adding Exhibitors
Managing Exhibitors on the Dashboard - Learn how to add and manage exhibitors on your event dashboard. This guide covers both manual entry and bulk upload methods for exhibitor details.
Navigating to the Exhibitors Section:
1. Access the Dashboard:
Log into your Dashboard.
Click on your desired Event.
2. Enter the Mobile App (CMS):
Look for the “Event Content” option.
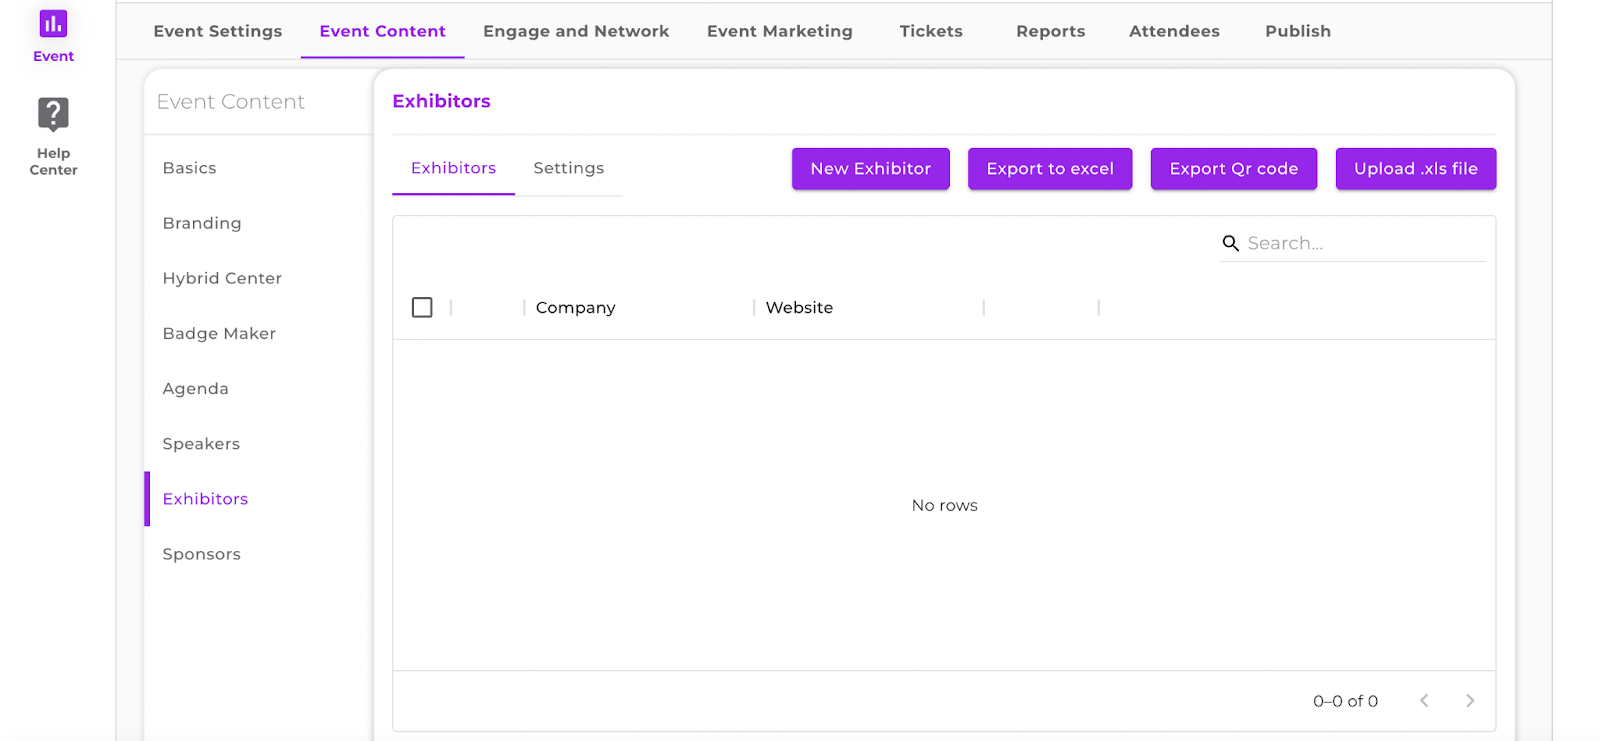
3. Selecting the Exhibitors Tab:
In the CMS Dashboard, click on the “Exhibitors” tab located on the left panel.
Manually Adding Exhibitors:
4. Initiating the Manual Entry:
Click on the “New Exhibitors” button.
This will open an exhibitor form.
5. Filling out the Exhibitor Details: Complete the form by entering:
Company Name
Website
Email Address
Social Media Details: Facebook, LinkedIn, Twitter
Embedded Video Link
Selected Venue
Category (You can create a new category if needed)
Documents
Image
Banner

6. Saving and Publishing:
- Click the “Save” button.
- Publish the exhibitor. They will now be visible on both the mobile app and the streaming site.
Bulk Uploading Exhibitors with an XLS File:
7. Starting the Upload:
- Click on the “Upload XLS” link.
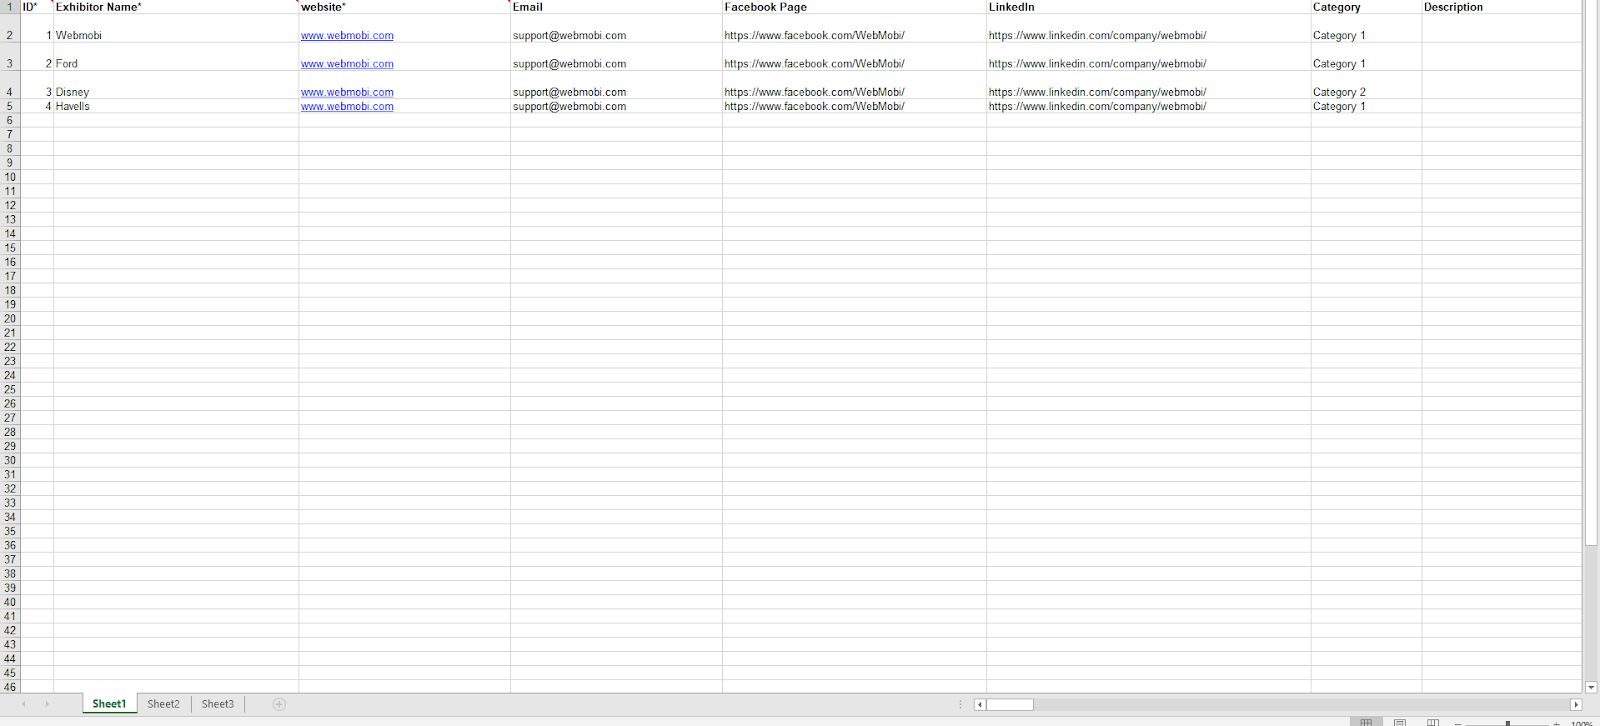
8. Downloading the Template:
- To ensure correct formatting, click on the “Download Template” button to get the XLS file template.

9. Entering Exhibitor Details in the Template:
- Fill in the details for each exhibitor in the template.
- Note: In the “Picture Name” section of the template, ensure that the picture name matches the name of the .zip file you'll upload in the next step.
10. Uploading Exhibitor Images:
- Navigate to the “Upload files” section.
- Upload the pictures of the exhibitors in a .zip file format. Only .zip files are accepted here.
11. Saving and Publishing Bulk Entries:
- Click the “Save” button to store the details.
- Click “Publish” to make the exhibitors’ details live.
Conclusion:
By following this guide, you can efficiently manage and display exhibitor information for your event, ensuring attendees have access to comprehensive exhibitor details.
Unit 8 - Adding Sponsors
Adding Sponsors to Your Event
Introduction:
Enhance your event's visibility and collaboration by adding sponsors. This guide will walk you through both the manual addition and bulk upload methods for sponsor details.
Navigating to the Sponsors Section:
1. Accessing the User Dashboard:
Log into your Dashboard.
Select your desired Event.
2. Locate Mobile App :
- Search for the “Event Content” tab within the Dashboard.
3. Accessing the Sponsors Tab:
- In the CMS Dashboard, click on the “Sponsors” tab located on the left panel.
Manually Adding Sponsors:
4. Beginning Manual Entry:
Click on the “New Sponsors” button.
This action will prompt the opening of a sponsor form.
5. Inputting Sponsor Details: Complete the form by entering the necessary details:
Company Name
Website
Email Address
Social Media Links: Facebook, LinkedIn, Twitter
Embedded Video Link
Category (Option to create a new category)
Document
Image
Banner
6. Finalizing and Displaying the Sponsor:
Click the “Save” button.
Then, publish the entry. The sponsor will now be displayed on both the mobile app and the streaming site.
Bulk Uploading Sponsors with an XLS File:
7. Initiating Bulk Upload:
- Click on the “Upload XLS” link.
8. Obtaining the Correct Format:
- For correct data entry, click on the “Download Template” button to retrieve the XLS file template.
9. Entering Bulk Data:
- Populate the downloaded template with the sponsors' details.
- Note: In the “Picture Name” section, ensure the image name matches the .zip file name you'll upload next.
10. Uploading Sponsor Images:
- Go to the “Upload files” section.
- Here, upload the sponsors' images in a .zip file format. Please note that only .zip files will be accepted.
11. Saving and Broadcasting Bulk Entries:
- Click on the “Save” button.
- Hit “Publish” to make all the sponsors' details available to the public.
Conclusion:
With this guide, you can seamlessly add sponsors, either individually or in bulk, enhancing the collaborative aspect of your event and providing attendees with important sponsor information.
Unit 9 - Adding Video
Adding Videos to Your Event Platform
Introduction:Elevate your event experience by integrating videos. This guide demonstrates how to manually add videos.
Accessing the Video Module:
Navigating to the Video Section:
1. Accessing the User Dashboard:
Log into your Dashboard.
Select your desired Event.
2. Locate Mobile App :
Search for the “Engage and Network” tab within the Dashboard.
3. Accessing the Video Tab:
In the CMS Dashboard, click on the “Display your videos here” tab located on the left panel.
4. Video Upload Page:
Once inside the Video page, you'll notice two methods for adding videos: manual entry and XLS sheet upload.
Manually Adding Videos:
3. Initiating Manual Entry:
Click on "Click to add your video link."
4. Video Details:
Provide the video's name.
Insert the YouTube URL where the video is hosted.
5. Finalizing Video Upload:
Click on the "Save" button.
After saving, make sure to publish it. The video will then be available on the mobile apps.
Conclusion:
Adding videos to your platform enriches the content available for your audience. By following this guide, you can seamlessly incorporate videos, either one by one or in bulk, to provide a multimedia-rich experience for your event participants.
Unit 10 - Survey
Incorporating a Survey into Your Event Agenda : Enhance attendee engagement by incorporating surveys into your event's agenda. This guide will assist you in manually adding surveys, bulk uploading them via XLS, and linking them to your agenda on the webMOBI platform.
Accessing the Survey Module:
1. Log in: Log into your admin dashboard.
2. Navigation: Select your event and navigate to the “Mobile App” option. Click on the Engage and Network Tab
3. Survey Module: If the "Survey" option is visible in the left panel, click on it. If not, select "Add features to your event" to introduce the Survey module.
Adding Surveys:
4. Manual Addition:
In the Survey Panel, select “Add Survey”.
Input your question in the “Enter Question” section. Choose your survey type from options like single choice, multiple choice, with or without feedback, or custom response.
For multiple-choice questions, click “Add more answers” to include options.
After finalizing, click “Save”. The survey question will now be viewable on the live stream.
5. Bulk Upload via XLS:
Click “Upload XLS” within the survey tab.
Download the survey template by selecting “Templates”.
Follow the template's format when filling out your XLS file.
Choose between “New File Upload” (for first-time uploads) or “Updated file upload” (for modifications to existing surveys).
After uploading, click “Save”. The survey will be available on both the live stream and mobile app.
Linking Surveys to the Agenda:
6. Accessing Agenda Settings:
Go to the Agenda tab.
Click on the “Settings” option.
7. Linking Process:
Select “Link Survey to Agenda Gateway”.
Associate the survey with the relevant category from your Agenda Session.
8. Finalization:
Click “Save” and then publish the changes to the dashboard.
9. Verification:
To confirm successful upload, visit the agenda section, select the session associated with the survey's category, and ensure the survey appears correctly.
Conclusion: By integrating surveys into your event's agenda, you offer attendees an interactive way to provide feedback on sessions and speakers, fostering better engagement and valuable insights for future events.
Unit 11 - About Us (WYSIWYG HTML Editor)
Adding 'About Us' in Your Mobile Event App - Accessing the Event Information Module:
1. Log in:
- Enter your credentials to access the admin dashboard.
2. Navigation:
- Locate and select your desired event.
- Click on the “Mobile App” option, followed by the "Engage and Network" tab.
3. Event Information Module:
- If you see the "About Us" option in the left panel, select it. If it's absent, click on "Add features to your event" to introduce the 'About Us' module.
Incorporating 'About Us' Information:
4. Accessing the 'About Us' Module:
- Click on “About Us” from the left panel. If it's not visible, introduce it by selecting "Add features to your event".
5. Input Information:
- Enter the desired content you wish to feature in the 'About Us' section of the mobile event app.
6. Save and Publish:
- Once satisfied with your input, click on the "Save" button.
- Proceed by publishing the update, making your 'About Us' information live on the mobile event app.
Conclusion:
Effortlessly introduce an 'About Us' section to provide attendees with essential event-related information, enhancing their understanding and experience.
Unit 12 - Contact Us
Adding 'Contact Us' in Your Mobile Event App - Accessing the Contact Us Module:
1. Log in:
Input your credentials to sign into the admin dashboard.
2. Navigation:
Find and select the event you wish to edit.
Navigate to the “Mobile App” section and then select the "Engage and Network" tab.
3. Contact Us Module:
Look for the "Contact Us" option in the left panel. If it's not present, click on "Add features to your event" to add the 'Contact Us' module.
Incorporating 'Contact Us' Information:
4. Accessing the 'Contact Us' Module:
Find and click on the “Contact Us” option in the left panel. If it's not available, click on "Add features to your event" to introduce the 'Contact Us' module to the panel.
5. Input Information:
Enter the required Email ID and Phone Number in their respective fields.
6. Save and Publish:
Confirm your input by selecting the "Save" button.
To make your 'Contact Us' details available on the mobile event app, click on "Publish".
Conclusion:
By effortlessly incorporating a 'Contact Us' section, you ensure that attendees can easily reach out with queries or feedback, enhancing their event experience.
Unit 13 - Banner Ad
Adding 'Banner Ad' in Your Mobile Event App - Accessing the Banner Ad Module
1. Log in: Enter your unique credentials to gain access to the admin dashboard.
2. Navigation:
Browse and select the desired event you want to modify.
Move to the “Mobile App” section and subsequently, opt for the "Engage and Network" tab.
3. Banner Ad Module:
Search for the "Banner Ad" option in the left panel. If it's missing, select "Add features to your event" to introduce the 'Banner Ad' module.
Incorporating 'Banner Ad' Information:
4. Accessing the 'Banner Ad' Module:
Spot and click on the "Banner Ad" option in the left panel. If not readily available, use the "Add features to your event" to incorporate the banner ad module.
5. Banner Ad Creation:
Within the banner ad module, find and select the "Add New Banner" button. Input a descriptive name for the banner ad in the provided section.
6. Image Uploading:
Add your ad image by pressing the "Choose file" option within the Ad-Image category.
[Note: An image cropping tool might appear once you've added the image file. Ensure to crop as necessary before finalizing.]
7. Ad Linking:
Navigate to the "Link Ad To" segment. Here, pick the specific pages or sections where you intend for this banner ad to appear within the mobile event apps.
8. Finalize and Publish:
Commit to your configurations by hitting the "Save" button.
To broadcast your banner ad across the mobile event app, ensure you click on "Publish".
Conclusion: Utilizing banner ads effectively can heighten event engagement and provide additional monetization avenues. Ensure your ad content is both visually appealing and relevant to your audience for maximum impact.
Unit 14 - Document
Adding 'Document' in Your Mobile Event App - Accessing the Document Module:
1. Log in: Input your unique credentials to access the admin dashboard.
2. Navigation:
Browse through and pick the event you wish to modify.
Proceed to the “Mobile App” category, and then select the "Engage and Network" tab.
3. Document Module:
Scan the left panel for the "Document" option. If it isn't present, click on "Add features to your event" to incorporate the 'Document' module.
Incorporating 'Document' Information:
4. Accessing the 'Document' Module: Identify and select the "Document" feature from the left panel. If it's not available, choose the "Add features to your event" to bring in the Document module.
5. Uploading Documents:
Inside the Document module, locate and click on the "Click To Add Pdf Files" button.
Provide a suitable name for the document and choose its relevant category.
6. Document Selection:
Click on the "Browse" button to navigate and select the desired document file from your local storage. Initiate the upload.
7. Preview & Finalize:
After successfully uploading, a miniature preview of the document will be visible on the left.
Confirm your selections and configurations by pressing the "Save" button.
8. Publish:
To ensure the document is accessible within the mobile event app, click on "Publish".
Conclusion:
Making documents available directly through the app ensures participants have easy access to essential resources, enhancing their event experience. Always review the document for accuracy and relevance before publishing.
Unit 15 - Activity Feed
Adding 'Activity Feed' in Your Mobile Event App
Accessing the Activity Feed Module:
1. Log in: Enter your unique credentials to access the admin dashboard.
2. Navigation:
Browse through the list and select the event you wish to enhance.
Navigate to the “Mobile App” section, and then choose the "Engage and Network" tab.
3. Activity Feed Module:
Examine the left panel for the "Activity Feed" option. If it isn't visible, select "Add features to your event" to add the Activity Feed module.
Incorporating 'Activity Feed' Information:
4. Enabling the Activity Feed: To activate the "Activity Feed" functionality in the mobile event apps, select "Activity Feed" from the "Add features to your event" dropdown menu.
5. Configuration: After selecting, ensure that all the necessary settings and permissions for users to post and interact are correctly configured.
6. Publish: Click "Save" to finalize your settings, and then "Publish" to make the feature live on the mobile event apps.
Conclusion:
The Activity Feed feature enables attendees to engage more interactively within the event app. They can post, share experiences, and interact with others by sharing images and comments. Ensure the guidelines are clearly communicated to attendees to maintain a positive and respectful community within the event app.
Unit 16 - Event Attendee List
Adding 'Event Attendee' in Your Mobile Event App
Accessing the Event Attendee Module:
1. Log in: Enter your unique credentials to access the admin dashboard.
2. Navigation:
Browse through the list and select the event you wish to enhance.
Navigate to the “Mobile App” section, and then choose the "Attendees" tab.
3. Event Attendee Module:
Examine the left panel for the "Audience Engagement" option.
How to Add Attendees
Go to the user dashboard and click on the “Audience Engagement Tab” to access the attendee options.
Adding Manually
Adding Through XLS file
Adding Manually
Click on the “Manage Attendees” button and choose the “Register Attendees” option which will open the registration form.
In the registration form, enter the details of the attendee. The following fields would be mandatory to fill.
Email id
First Name
Last Name
Company
Once you have added the details, click on the “Save” button and the details would be saved.
You can see the details of the participants under the Registered Users section.
Adding through XLS file
On the attendees’ page, click on “Download Template” to download the template for the Excel file.
The following fields are mandatory
User Id
First Name
Last Name
Email
Company
Click on the “Browse” button to browse for the attendees’ file on your device and select that device to open the file.
Now the attendees are uploaded successfully.
Now the Information is visible and you can edit accordingly.
How to Update Attendee Information
This also can be done manually as well as in an XLS file.
Manually
Click on the Name/Company Name to edit it.
In XLS file
You can edit the basic information in the XLS file and upload the file once again by browsing and choosing the file.

Export the Attendees
You can Export Attendees data, Export the CheckedIn data, and the Invited Attendee list by clicking on the “Export Attendee” drop-down menu.

Assign a Specific Session to the Attendees
You can add a session to a specific attendee. For this, download the XLS file and fill in the Agenda Category column and Upload it.
After updating the attendee, click on the Agenda and add the category that you want to see in the schedule.
This can also be done in two ways
Manually
XLS File

Save and Publish the Agenda
Export Attendee Report
In the User Dashboard, click on the “Audience Engagement” tab.
Click on the “Export Attendees” tab and you will see the drop-down with options to choose from.
Export Attendees Data
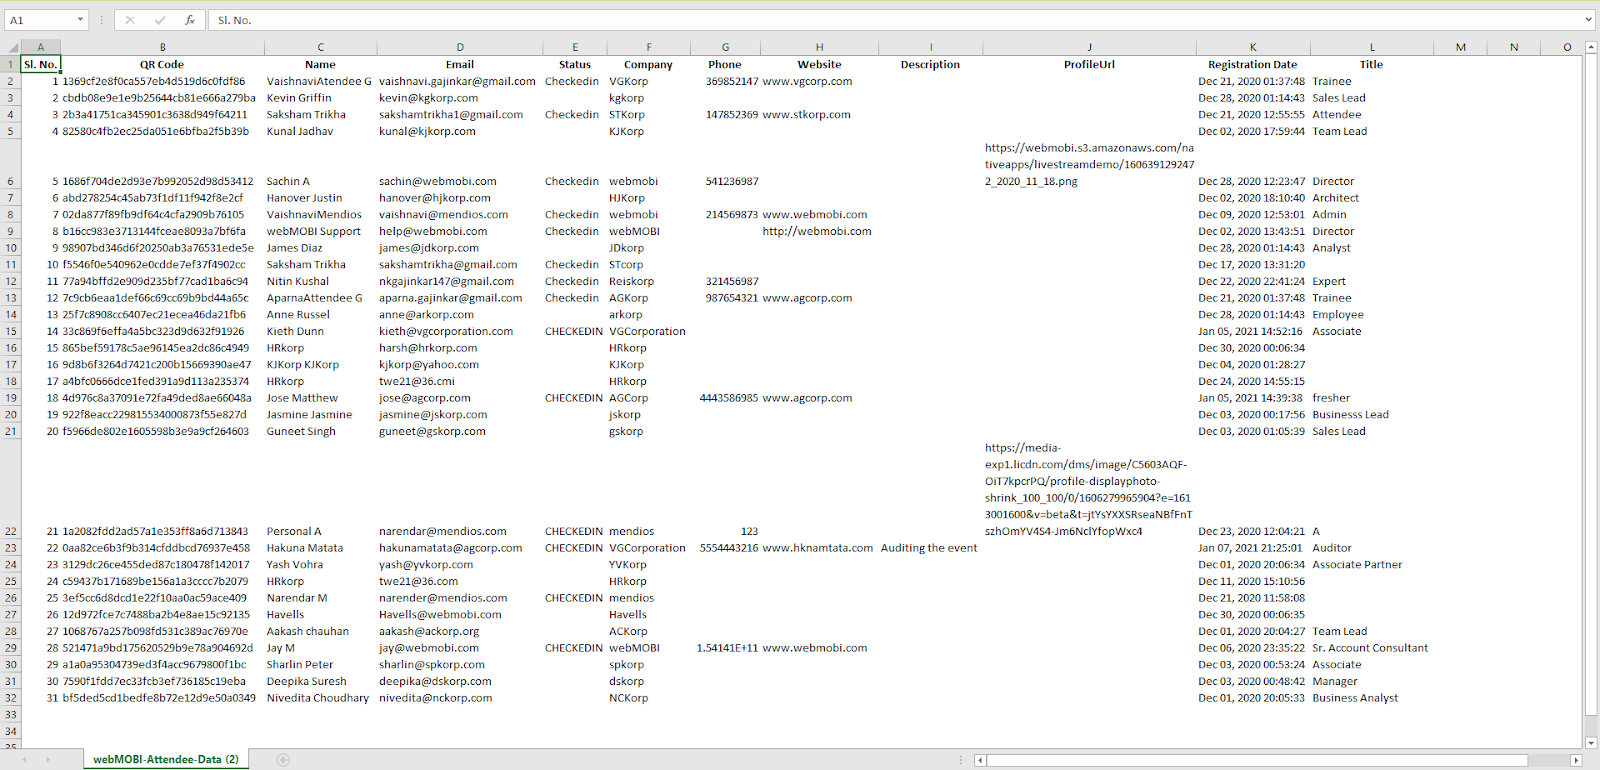
Export Check-In Data

By clicking on the various Excel sheets below, you can access the Check-In Data of the specific Agenda.
Export Invited the Attendees List
Unit 17 - Gallery
Adding 'Gallery' in Your Mobile Event App - Accessing the Gallery Module:
1. Log in: Enter your unique credentials to access the admin dashboard.
2. Navigation:
Browse through the list and select the event you wish to enhance.
Navigate to the “Mobile App” section, and then choose the "Engage and Network" tab.
3. Gallery Module:
Examine the left panel for the "Gallery" option.
Adding Gallery Image
This article explains how to add gallery images to your event.
Click on the “Content Management System” tab in the User Dashboard.
In the Dashboard, click on the “Add features to your Event” to add the “Gallery” option.
Click on the “Gallery” option and click on “Add”.
Click on the “Gallery” option in the left panel.
Click on the “Click to Browse” button to choose a file on your device. Click on upload and then click on the Save button.
(Note: Only .zip files can be accepted)
Save and Publish the event and your photos will be uploaded.
You can also view and delete gallery images from the dashboard. You can click on “Show feed Images on Gallery” to view the already posted images.
Unit 18 - Attendee
Attendee Management Module User Guide
1. Getting Started
Navigating to the Module:
- Begin by accessing the User Dashboard.
- Click on the “Audience Engagement Tab” to enter the Attendee Management Module.
2. Attendee Registration
2.1 Manual Registration:
1. From the Audience Engagement Tab, click “Manage Attendees”.
2. Choose “Register Attendees”.
3. A form will appear:
- Fill in the required fields: Email ID, First Name, Last Name, and Company.
- Optionally, enter a custom QR code. If left blank, the system will use the event user ID as the QR code.
4. Click “Save”. Your attendee is now registered!
2.2 Bulk Registration:
1. Click “Download Template” to understand the required XLS format.
2. Populate the XLS file with attendees' details.
3. Click “Browse” on the attendees page, locate your XLS file, and select "Open".
4. Attendees are now uploaded and visible under the Registered Users section.
3. Attendee Update
3.1 Manual Update:
1. Go to the Registered Users section.
2. Click on an Attendee’s Name or Company Name.
3. Edit the desired fields.
4. Save changes.
3.2 Bulk Update:
1. Edit your original XLS file or download the current data and make modifications.
2. Browse and upload the modified XLS file.
3. The system will update records based on the User ID or Email.
4. Export Attendee Data
1. Click on the “Export Attendees” tab.
2. From the dropdown, choose:
- Export Attendees Data
- Export Check-In Data
- Export Invited Attendee List
3. Your selected data will be downloaded in Excel format.
5. Assigning Sessions to Attendees
5.1 Manually:
1. Click on an attendee's name.
2. Add desired sessions from the available list.
3. Save changes.
5.2 Using XLS File:
1. Download your attendee list.
2. Fill in the “Agenda Category” column with the desired sessions.
3. Upload the updated XLS file.
4. The sessions will be automatically assigned to the attendees.
6. Integrating with the Mobile App
1. On your dashboard, click “Add a new feature to your menu”.
2. Select “Attendee” from the available module list.
3. Click "Add". The Attendee's options will now appear on your dashboard's left panel.
4. Publish changes to update your mobile event app.
7. Sending Invitations to Attendees
1. Click “Manage Attendees”.
2. From the dropdown, select “Send Campaign Email”.
3. For a new campaign:
- Click “Create New Campaign”.
- Fill in message details and the message body.
- Optionally, choose variables from the provided list.
- Click “Submit” to save the campaign.
4. To send:
- Select your campaign.
- Choose attendees to send the invitation to.
- Either send immediately or schedule it by setting a date and time.
8. Multi-event Campaigns
1. From the dashboard, select “Multi-Events”.
2. Click “Content Management System”.
3. From the dropdown, select your desired event.
- This redirects you to that event's user dashboard for campaign management.
9. Year-Round Events
Ensure you've set both a start and end date for year-round events when creating or updating your event in the system.
10. Custom QR Codes for Attendees
Each attendee will have a QR code. By default, this will be based on the event user ID. If a custom QR code is entered in the dashboard, that will be used instead.